Thursday, December 9, 2010

A Lot of Catching Up to Do


Hello blog friends! I logged on this morning and saw that the last time I wrote was in October. October!
Honestly, I am not sure where time goes, especially around the Holidays.
I know I have a lot of catching up to do, but don't worry, I'll make it brief.

First things first- the big news- Gian Luca and I bought a house!
We closed the deal in October but just moved in a week ago, so you can imagine how busy we've been. And living out of a suitcase isn't really conducive to cooking. But thankfully, my mom came here to help us so we're mostly unpacked and settled in. I'm actually sitting in my new kitchen right now!

Next- Since I haven't been working in Texas I've had lots of time to write, and I wrote a new book. It's fiction but with lots of recipes. I don't want to give too many details now, but I think you'll like it.

Oh yeah, and I got a job. And I cooked my very first turkey this Thanksgiving. And ate my first quince.

Whew!

So now that you're all caught up, it's time for a recipe, and this Shrimp Risotto is straight from my mom. She made this here the other night, and taught me that risotto is nothing to be afraid of. It's quite simple and fast actually, so don't believe all the hype about stirring and stirring and stirring- it's just not true.

So here goes- Simple Shrimp Risotto- Enjoy!
Shrimp Risotto
Serves 4

For the risotto
1 small onion, diced
2 tablespoons olive oil
1 tablespoon butter
1 pound of small shrimp
2 cups Arborio rice
1 cup white wine
3-6 cups water boiling water
salt to taste
1/2 cup of fresh Italian parsley, chopped.

1) Heat olive oil and butter in a large, deep saute pan. Add the onions and cook until translucent.
2) Add the shrimp and cook until just pink.
3) Add the Arborio rice and stir until all the rice is coated with oil and butter. Continue cooking for one minute.
4) Add the white wine and stir until it is all absorbed.
5) Add one cup of water. Allow the rice to absorb all the water before adding more.
6) Repeat until all the water is used. Add salt to taste.
7) Cook until the rice is soft, with a slight bite to it.
8) add chopped parsley and stir to incorporate.
* the risotto can be eaten like this, or with the addition of extra shrimp( see below)

For the shrimp on top
2 tablespoons extra virgin olive oil
1 garlic clove, chopped
1 cup white wine
1/2 pound medium or large shrimp

1) In a medium saucepan, heat the olive oil.
2) add the garlic and sautee until golden.
3) add the shrimp and cook until pink.
4) add the white wine and salt to taste.
5) spoon over risotto and top with fresh parsley.

Enjoy!

Thursday, October 14, 2010

Imagination in the Kitchen


As most of you already know, when I was seven, my parents made a move that would change my life; they opened a restaurant. They were hands-on restaurateurs, running on a tight budget, so my mother cooked while my father worked his day job and managed the restaurant at night. Being the youngest of five children, I was always attached to my parents, and while my brothers were perfectly content to stay home alone or with a babysitter, I refused to do so. The only option was to keep me in the kitchen, close to my mother while she worked.

At first, I was excited to be there and see the bustle of the kitchen. But after about one day, I was bored. I grew anxious and, like a typical seven-year old, began whining. Not knowing what else to do, my mother handed me a large stainless steel mixing bowl, positioned a large crate of sting beans at my feet and gave me a task that would keep me busy for hours.
“Snap these” she said, demonstrating how to removed the unwanted ends of the beans. “When they're clean, put them in this bowl.”
"How many should I do?” I asked, thinking that I would have to snap fifty or at most, one hundred.
“The entire case” my mom replied, returning to work behind the stove.

I looked at the box at my feet. There were at least a thousand beans in there. My eyes grew wide and I sighed heavily. The restaurant was ruining my life, but I knew if I kept complaining I’d be homebound with a babysitter, so I reached in the case and grabbed a handful of beans.
Though the work seemed daunting, I tackled it with finesse. As my tiny fingers worked rapidly, my mind reeled. I made up stories, pretended to be different characters; a lost princess held captive and forced to work kitchen duties; a farm girl responsible for the family dinner. Lost in thought, I didn’t realize that time had passed. Before long a huge pile of beans filled my bowl; I had finished the entire case and had had fun doing so.

Looking back, it's clear that my early time as an impromptu sous chef taught me an invaluable lesson; it taught me to use my imagination in the kitchen. Often I would see my mother experimenting, adding ingredients, tasting, stirring, and, sitting next to her with my pile of beans I’d pretend to be a chef doing the same.

Nowadays, I do not pretend to be someone I’m not, however, I still allow my mind to wander when faced with tasks that are so banal, like snapping string beans, that they require little attention or thought. During these moments, I’ll get inspired to throw a little extra spice into a dish, or mix ingredients that generally do not work well together. I’m no chef, just a home cook who allows her imagination to run wild. Sometimes I come out on top, and other times the food ends up half eaten or scraped into the garbage. But either way, I am successful, if I am able to relax, to experiment, and have fun. Which is really what cooking is all about anyway.

String Beans with Garlic and Mint

1 pound string beans
1 small clove of garlic (chopped)
3 tablespoons extra virgin olive oil
2 tablespoons fresh mint (chopped)
salt and pepper to taste

Blanche sting beans in salted boiling water for 3 minutes. Drain and transfer into a salad bowl.
While beans are still warm, top with garlic, mint, olive oil and salt and pepper. Toss together and serve.

Thursday, October 7, 2010

Lovely Split Pea Soup


We've been in Texas for a good four months now, and although I'm loving my new state ( and this absolutely gorgeous October weather) I do have one minor issue...

They say everything is bigger in Texas and they're not joking. It's almost impossible to go to a restaurant and not get a Texas sized portion put on the plate in front of you. And meat dominates most of that plate. Now, its not that I've gone vegetarian or anything, but frankly, I'm tired of meat!

The other day, in a near frenzy, I decided to take matters into my own hands. I ran out to Whole Foods and bought fish- wonderful calamari- which I thought I'd score and grill in a hot pan.

Earlier in the day, I'd been flipping through Jamie Oliver's Jaime at Home and saw an amazing recipe for grilled calamari with leeks. The picture made me salivate; I wanted that dish right now. Within half hour, I was picking up the goods and dreaming of the clever post I'd share with you all.

The calamari smelled funny right from the start, but to be honest, I wasn't quite sure what calamari was supposed to smell like, so I proceeded as I normally would, prepping the fish with salt and pepper, getting the grill hot enough.

But somewhere along the line, our kitchen ( or, more accurately, our entire apartment) filled with fishy smoke. I opened all the windows and had all the fans going, but the smell lingered, and despite the fact that the leeks looks beautiful, I didn't even want to try the calamari. So I threw them in the oven to get them out of my sight.

To escape the smell, I went to pick up Gian Luca at his office. I drove with the windows down, but the minute he got into the car, his face wrinkled into a scowl.
"What's for dinner?" he asked.
"Grilled Calamari," I said with a smile, hoping that if I made it sound good, it would taste OK.

But when we entered the apartment the smell slapped us in the face. "Oh my God," Gian Luca exclaimed. "It smells like a dead whale in here."
Only he didn't say it in English. He said it in Italian. And though balena morta, sounds lovely, it's not exactly what you want to eat for dinner.
Still hoping for a miracle, I pulled the calamari out of the oven. In horror, I looked at the shriveled, dried out fish. 'We're not eating this," I sighed, and Gian Luca whole heartily agreed.
We ate fried eggs and toast for dinner that night.

Ok, so maybe the calamari thing didn't turn out exactly as planned. Still, the thought of eating another steak, or even piece of chicken was making me sick, so I tried a completely vegetarian option this time. Split Pea Soup.
And after simmering on the stove for an hour, it flavored the house with that wonderful soup smell.
And it tasted even better.


Split Pea Soup

1 bag dried split peas
1 small onion
4 celery stalks
3 carrots
2 tablespoons extra virgin olive oil
6 cups of water
1 1/2 teaspoons salt
1 teaspoon black pepper


1) Finely chop the onion, celery, and carrots in a food processor. Heat the olive oil in a large soup pot, over a medium flame.
2) Add the chopped onions, celery and carrots and cook for a few minutes, until slightly golden.
3) Add the split peas, water, salt and pepper. Bring to a boil.
4) Lower heat and simmer the soup until peas are tender. ( About 1 hour)
5) If you like a creamier soup, let the soup cool slightly and spoon into a blender. Blend until smooth.
6) Serve with grated cheese and a dash of cayenne pepper, for an added kick.

Thursday, September 23, 2010

The Classics


Just as soon as the September wind starts rustling the leaves, I start thinking about school.
It's been more years than I want to admit since I've been enrolled in school, and even a few years since I've been teaching, but inevitably, in the beginning of September each year, I stock up on school supplies ( you always need pens and notebooks around the house, especially when they are 25 cents each!), and start reminiscing about packing up my school bag, grabbing my bagged lunch, and heading off to school.

I also start thinking about the classics. I've always been keen on the classics.
Instead of taking Spanish or French in high school, I opted for Latin because it doesn't get more classic than that. In college, I learned to enjoy some classics ( like Plato and Aristotle) and loathe others ( Beowulf- ugh!), but still my appreciation for things untouched by time grew.

And you have to admit, sometimes the classics are just better. For example, everyone has a piece in her wardrobe that's timeless- a piece that was purchased years ago, that has withstood its trendier counterparts, and still hangs proudly in the closet. For me, its a vintage blue Fontana dress that I found in a thrift shop in Rome. Even though the dress is from the 50's it still looks amazing and is guaranteed to reap at least one compliment each time I wear it. It is by all means, a classic.
Then of course, there are recipes which we cook without effort, ones which we keep in our back pockets for dinner parties ( mine is lasagna) and others which we can whip up on a moments notice with ingredients we already have in the house ( like the pasta with zucchini and lemon that I'm going to make as soon as I finish this post).
Still, there are tried and true classics which everyone should learn. And in terms of cookies, I can think of two biggies- chocolate chip ( obviously), and shortbread.
Since I'm always trying to expand my baking repertoire, and I already know how to make a decent chocolate-chip cookie, I figured it was high time I learned how to make a proper short bread cookie.

And now that I've got them under by belt, it seems like there's no better use for flour, butter and sugar.
Give them a try, and then snuggle up with a classic novel( just not Beowulf!) and a cup of tea. Enjoy!


Classic Shortbread
( adapted from Martha Stewart)
makes 8 extra large cookies

2 cups all-purpose flour
1 1/4 teaspoons course salt
1 cup ( 2 sticks) unsalted butter, at room temp, plus more for the pan.
3/4 cup confectioners' sugar.

1) Sift together flour and salt into a bowl. Put butter into the bowl of an electric mixer fitted with the paddle attachment. Mix on medium-high speed until fluffy, 3-5 minutes, scraping down the sides of the bowl. Gradually add confectioners' sugar; beat until pale and fluffy, about 2 minutes. Reduce speed to low. Add flour mixture all at once; mix until just combined.

2) Preheat oven to 300 degrees F. with rack in upper third.

3) Using plastic wrap, press dough into a buttered 10-inch fluted tart pan with a removable bottom. With plastic on dough, refrigerate for 20 minutes. Remove plastic wrap. Cut out a round from the center using a 2 1/4 inch cookie cutter; discard. Put cutter back in center. Cut dough into eight wedges with a paring knife. Using a wooden skewer, prick all over at 1/4 inch intervals.

4) Bake until golden brown and firm in the center, about 1 hour. Transfer pan to wire wrack. Recut shortbread into wedges; let cool completely in pan. Cookies can be stored in a airtight container at room temp for up to 2 weeks.

Tuesday, September 14, 2010

Sunshine on a Plate


Can you believe it's already September 14th? Honestly, where does the time go?
September is actually my favorite month of the year because it seems like no matter where I live, I get to savor the long Indian Summer days.

In New Jersey, September is my favorite time at the shore because the beaches are no longer crowded and the water is actually warm ( if you've ever been to the Jersey shore, you'll know that the water is usually ice cold).


And of course, here in my new state, September is just an extension of the summer. We've had multiple days over 100 degrees and I've soaked up each one. It seems like it's always sunny in Texas.

So, logically, I wanted to capture the same sunshine on my dinner plates and this lemony Tilapia dish does just that. With a side of spinach and seasonal spaghetti squash, dinner can be served in less than 30 minutes, leaving you with plenty of time to grab an Iced Tea and head outside to catch the breathtaking September sunset.


Broiled Tilapia

Serves 2

2 Tilapia filets
1 lemon
2 tablespoons chopped Italian parsley
1 clove of garlic, finely chopped
1 tablespoon extra virgin olive oil
salt and pepper to taste


1) Lay Tilapia on a non-stick baking sheet. Grate the zest of one lemon over the Tilapia.
2) Top with parsley, garlic, olive oil, and the juice of one lemon. Add salt and pepper to taste.
3) Place under broiler for 7 minutes ( or until cooked through)


Sauteed Spinach

2 cups Spinach
1 clove of garlic ( whole or chopped depending on your taste)
1 tablespoon extra virgin olive oil
salt and pepper to taste

1) Heat olive oil in a medium saucepan. Add the garlic and sautee until lightly golden.
2) Add the spinach and toss until wilted ( about 1 minute)

For spaghetti squash click here

Enjoy!

Tuesday, August 24, 2010

A truce, a birthday and english soup

Okay Texas- I'm calling a truce. Since we'll be living in Texas for God know how long, I need to make peace with the state. I guess it's not that bad- out of the month and a half we've been here we've had sunshine every day. And yes, its hot, but its not too humid, so it feels good.

Besides the weather, Texas has a lot to offer. It is the biggest state in the union, so there's so much to do and see. We've been to Dallas a few times, and are looking forward to trips all around the state. So I guess Texas and I can be friends. Whew- our little feud was getting tiring.

Now that that's out of the way- I had a recipe for you ( or y'all as the Texans would say).
Yesterday was Gian Luca's birthday and to celebrate, I made his favorite dessert Zuppa Inglese.

Zuppa Inglese translates to "English Soup" and the only reason I can think of for the name is that this dessert is like an English Triffle and is sometimes served in a bowl.

Originally created to use the scraps from a cake, Zuppa Inglese is layers of cake, cream, chocolate, coffee and Alchermes, a spicy, sweet liquor from Italy.


It's almost impossible to find Alchermes here in America. I actually just googled it and no one sells it. It's not even imported and there are no recipes to make a bath-tub version either.

Last year, for Gian Luca's birthday I drove to all the best wine shops in Minneapolis and Saint Paul, asking everyone who I talked to about it. No one had ever heard of it, and back then, I didn't know what it tasted like, so my only description of the liquor was that it was bright red. Upon hearing this, people in the first two stores led me to the Campari, which is bitter and wonderful but nothing at all like Alchermes. I gave up in frustration and made Tiramisu instead.
This June, when we went to Italy, Gian Luca's mom bought us a bottle to take home. If you're interested in getting a bottle you apparently have to do the same. Or ask a friend who's going to Italy.
If no one you know is going to Italy any time soon, you can still make the Zuppa Inglese because the rest of the ingredients are delicious, even without the Alchermes. And if you want the beautiful splash of red color- just fake it and use grenadine.

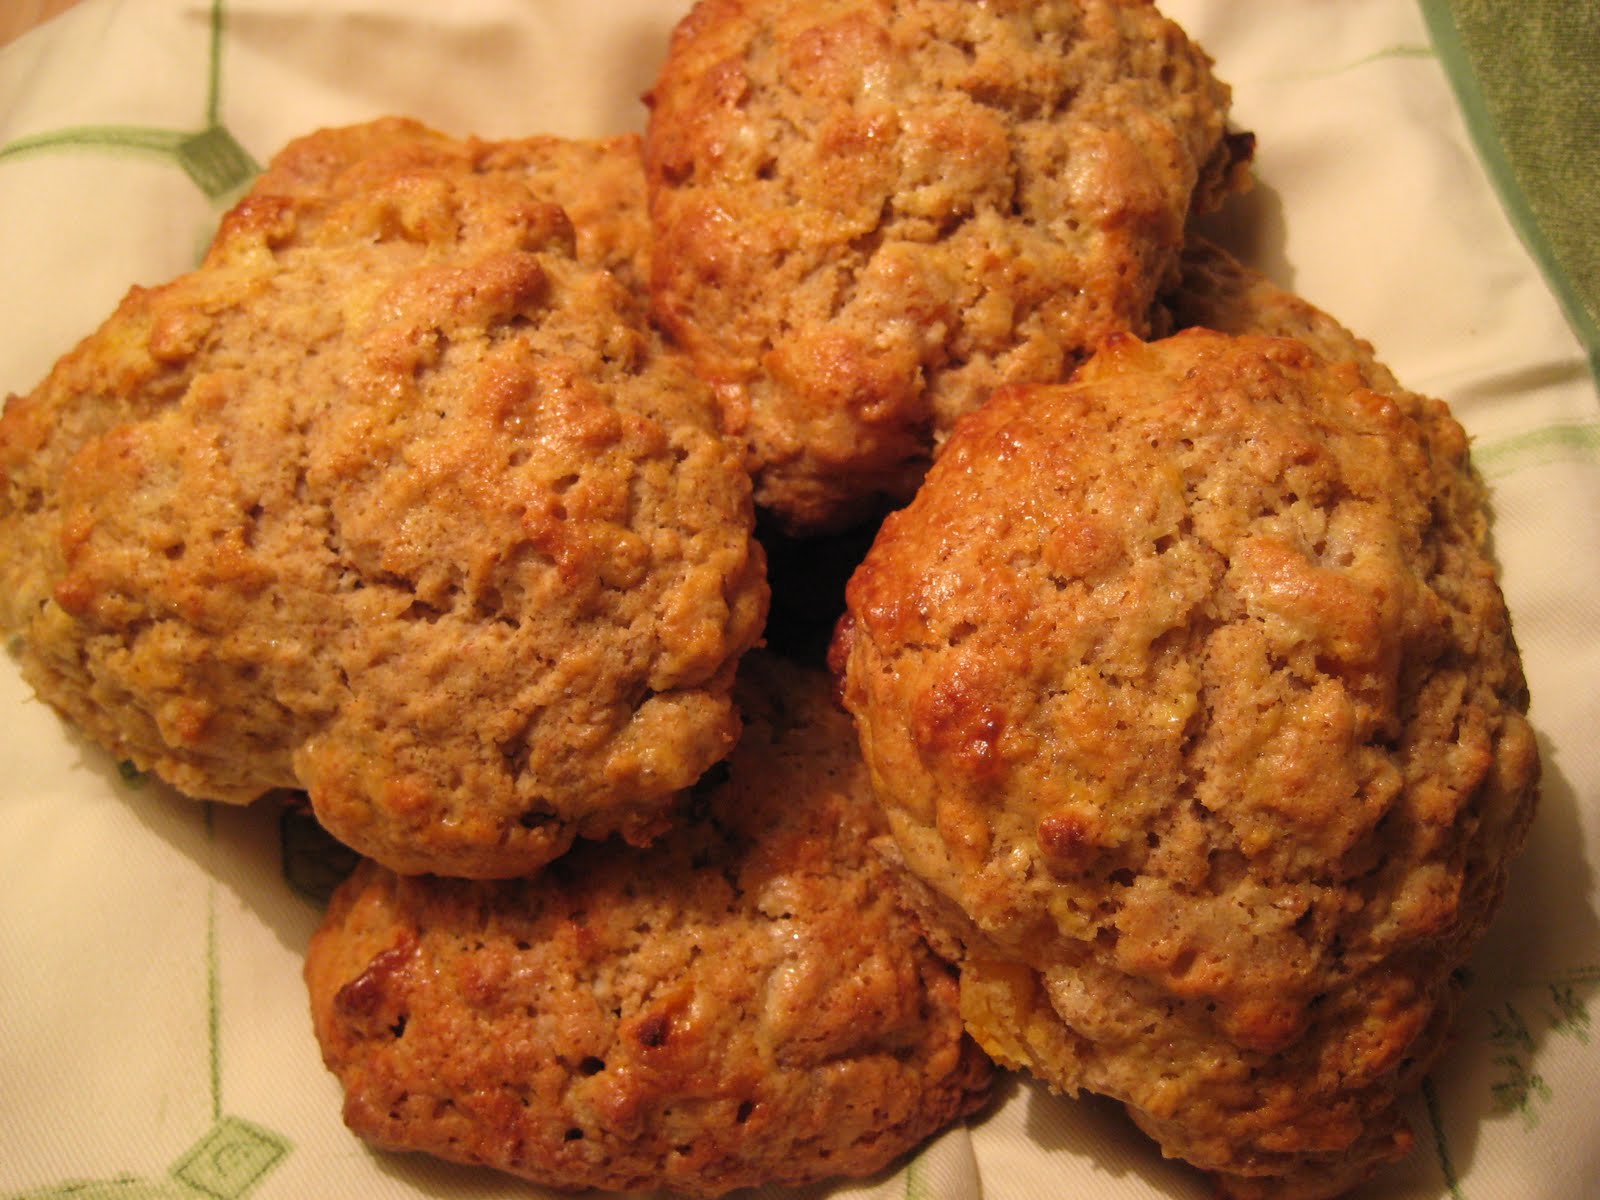
Zuppa Inglese can be made with either Savoiardi ( Dried Lady Fingers) or Pan di Spagnia ( yes, translated that means "bread from Spain"- what an international dessert!). It was impossible for me to find the Savoiardi here in Texas, so I opted for the Pan di Spagnia, which I can easily make at home.

Basically Pan di Spagnia is Italy's version of Angel Food Cake, though you don't have to bake it in a tube pan or hang it upside down on a bottle ( I never understood the need for that!). My mom's version of Pan di Spagnia ( see recipe below) is make in a 9 inch spring form pan, which makes it easy to remove.

But even if you break the cake, or, if like me, you don't cook it long enough and the center turns out a bit raw, it's not big deal. Zuppa Inglese is made by layering pieces of cake with cream, so feel free to cut, tear, or rip off big hunks of your freshly baked Pan di Spagnia.

The cream in Zuppa Inglese is Crema Pasticchiera- Italian Pastry cream, which can also be used in a variety of desserts like Italian Rum Cake, or cream puffs. Its lemony and not too sweet, perfect for a Zuppa Inglese.

Besides the cake and the cream, all you need is a little chocolate powder or chocolate chips and a nice strong double shot of espresso.

My husband was on to something with this one. Who wouldn't love a dessert that combines Liquor, Cream, Chocolate and Espresso?
Happy Birthday Gian Luca!


Zuppa Inglese:
Zuppa Inglese can be made as one large Trifle, or in individual glasses, as I did. This recipe makes enough for six people and can be kept in the fridge for one day.

Pan di Spagnia
5 eggs, separated
1 cup sugar
3/4 cup all purpose flour
1 teaspoon Baking powder


1) Preheat oven to 400 degrees. Line the bottom of a 9 inch spring form pan with wax paper. Set aside
2) In a large bowl, beat egg yolks with sugar until soft yellow ( about two minutes)
3) In a different bowl, beat egg whites until they form stiff peaks.
4) Sift together flour and baking soda.
5) Alternate folding the egg whites into the yolks, adding a small bit of flour after each incorporation. Repeat until all the egg whites and flour have been added.
6) pour into prepared pan and tap the pan against the counter a few times to settle any air bubbles.
7) bake for 25-30 minutes or until a toothpick inserted in the center comes out clean.


8) For the Crema Pasticchiera recipe click here

9) Once you've made your cake and cream, and the cream has chilled for at least an hour, take half of the cream and place it in a separate bowl. Set the rest aside.
10) depending on whether you like dark or semi-sweet chocolate, you can either add coco-powder to the cream, stirring until incorporated, or you can melt 1/4 cup of chocolate chips and stir that into the cream. I actually did a mixture of both.
11) Brew a double shot of espresso and add a shot of hot water to weaken it a bit.
12) Cut the cake into cubes and begin layering you Zuppa Inglese like so: Cake, coffee poured directly on top, a drop of Alchermes ( or grendine), plain crema, and chocolate crema. Repeat as necessary.


Saturday, August 14, 2010

When it rains...

Plum Skillet Cake Recipe


Whoever invented the saying, " when it rains, it pours," must have lived in our apartment in Texas. If you've been reading this blog, you know that the Lone Star state and I don't really get along too well, and my last week proved that things were not getting any better.

It all started last Thursday when I left the apartment for a mere 10 minutes to go the laundry room and throw a load of wash in the machine. I returned to find a small lake in the middle of my apartment floor. I thought we had just left the state of 10,000 lakes, but apparently, I was wrong. Though I couldn't locate the source of the leak, I cleaned up the mess and called maintenance. Little did I know this would be one of the 17 phone calls I'd make over the next six days, or that the bucket full of water that I wrung out of rags would be the first of many that we'd have to deal with.

Yes, that's right, our apartment flooded for six days before management finally called a plumber.

At a certain point during day two of the floods, I needed to bake a cake to bring to a friend's house for dinner. Since I couldn't exactly leave the apartment, lest a plumber finally show up only to be locked out of the place, I had to make do with what I had in the kitchen. I found some flour, sugar, butter and nectarines. Since we still don't have internet in our place (don't even ask) searching for a recipe on google was out.

Naturally I turned to Martha, and found a delicious looking recipe for a skillet cake in the August issue of Martha Stewart Living. I don't have a skillet but the recipe said I could use an 8-inch cake pan instead.

Since I was using a cake pan, I forgot that this cake is called a Skillet Cake for a reason, and as I prepped the ingredients, whipped the butter and sugar, and sliced super thin slices of nectarines, I never once pondered the name. I had never made or eaten a skillet cake, so I was blindly unaware that it is to be served in the skillet. It makes sense, I know, but Martha also forgot to mention it in her recipe ( tisk tisk). So when the beautiful plump cake had completely cooled I thought it appropriate to try to flip it out of its pan. After all, I certainly didn't want to bring a luscious cake to someone's house in a cake pan. That would be like dressing a Van Gough painting in an Ikea frame.

I slipped a plate over the cake and inverted it. Nothing happened. I tapped the bottom of the pan one, twice, three times. No luck. The cake wasn't budging. I should have stopped there. But no, I was determined, full of frustration from my floor and the phone calls which had been ignored, and the way that management was treating us. So I flipped the cake upside down on a plate and whacked it, causing the center to fall out in big crumbs.

Then I understood why it is called a Skillet Cake. You're not supposed to take it out, instead, you're supposed to serve it right in there. I was so mad at myself that I wanted to scream or cry or at least, call Gian Luca and have him tell me it was no big deal.

Then the floor started flooding again. And as tears rolled down my face, I realized there was nothing I could do so I took a piece of the cake in my hands and ate it. At least it tasted good.


Plum Skillet Cake
Photo and Recipe Adapted from Martha Stewart Living

Serves 4

  • 4 tablespoons unsalted butter, room temperature, plus more for skillet
  • 1 cup all-purpose flour, plus more for skillet
  • 1/2 teaspoon baking powder
  • 1/4 teaspoon baking soda
  • Coarse salt
  • 3/4 cup plus 2 tablespoons sugar
  • 1 large egg
  • 1/2 cup low-fat buttermilk
  • 2 ripe medium plums, thinly sliced

Directions

  1. Preheat oven to 375 degrees. Butter an 8-inch ovenproof skillet (preferably cast-iron); dust with flour, tapping out excess. Whisk together flour, baking powder, baking soda, and 1/2 teaspoon salt. Beat butter and 3/4 cup sugar with a mixer on medium speed until pale and fluffy. Beat in egg. Add flour mixture in 3 additions, alternating with buttermilk.
  2. Pour batter into prepared skillet, and smooth top with an offset spatula. Fan plums on top, and sprinkle with remaining 2 tablespoons sugar. Bake until golden brown and a toothpick inserted into the center comes out clean, 35 to 40 minutes. Let cool slightly.

Thursday, July 29, 2010

Summer Muffins

Sorry for another post without pictures but we still haven't gotten this internet fixed!

I love reading, always have, always will. And I especially love reading in the summer ( chalk it up to all those lazy mornings on the beach).
Last summer I started a tradition of reading food memoirs* because they're fast, usually fun, and easy to enjoy when your feet is in the sand. And even though we're not near a beach this year, I still picked up a nice food memoir to enjoy by the pool. Though this one was not all about the food.

You may know Paul Deen from her food network shows but trust me, you do not know the real Ms. Deen until you've read her book It Ain't All About the Cookin'
In it, she shares her rags- to- riches story in her famous comforting tone. Really, the more I read the more I felt like I was sitting at Aunt Paula's table drinking a cup of coffee with her. (After reading, you'll want to call her Aunt Paula too).

Paula Deen's tale is not only inspirational, its also full of recipes.

Now I'm not a big fan of cooking southern food, and we all know Aunt Paula is the queen of butter and mayo. If you read my blog you'll know that I'm not a butter or mayo queen, so I am hesitant to try most of her recipes.

But when I came across her recipe for "The Best Damn Blueberry Muffins You'll Ever Eat" I had to give them a try.
Well Aunt Paula didn't lie. They really are the best: moist and cakey, with lost of juicy fruit and a crackly sugar topping. Perfect for a summer brunch.

Give them a try and let me know what you think.


Paula Deen's Blueberry Muffins

2 cups flour
2 tsp baking powder
1/2 cup sugar
1 stick melted butter
1 egg ( lightly beaten)
3/4 cup whole milk
1 1/2 cup fresh blueberries
1/2 cup brown or white sugar

1) Preheat oven to 350 degrees F. Grease and flour a 12 cup muffin pan.
2) In a large bow, combine the flour, baking powder and sugar. Set aside.
3) In a smaller bowl, combine the butter, egg, and milk. Mix well
4) Slowly pour the wet ingredients into the dry, stirring until all the dry is incorporated.
5) Gently fold in the blueberries, careful not the break them.
6) Spoon batter into muffin cups, filling each one 2/3 of the way full.
7) Bake for ten minutes.
8) Remove muffins and top with brown or white sugar. Return to oven for an additional ten- twenty minutes, or until a toothpick inserted into a muffin comes out clean.
9) Let cool in pan for ten minutes before turning out.
Enjoy with a nice tall glass of milk.


*send me your recommendations. I need a new book to read!

Sunday, July 25, 2010

A re-vamp

This is just a quick note to say that I've re-vamped my other blog Cipolliness. Please take a look and let me know what you think!

Stay tuned tomorrow for a fabulous summer recipe, and ( hopefully) a picture too!

Friday, July 23, 2010

Learning to Love

My mom makes a mean gnocchi. Seriously, people line up for them at my brother's restaurant and there's major drama when we run out. I've seen it. Now, as I understand the demand for the gnocchi- ( they are the most fluffy and light pillows of pasta you'll ever taste), I have a confession to make: I'm not a big fan. It's nothing against the gnocchi, I just prefer dried pasta to fresh ( with the exception of lasagna which I'd eat everyday if my metabolism allowed it).

Consequently, my husband loves gnocchi. I think they're his # 2 pasta choice ( second only to pici) and I'm fairly certain they're the only fresh pasta he has ever made (and he's made them on more than one occasion). Really, he is so happy smashing those potatoes up and rolling them with flour to make dough- it's a sight to see. I love my husband, and would do anything for him, so I make the little devils and lovingly eat them, dreaming of penne or capellini with each bite.

And since we've moved to Texas, I've done a lot of dreaming, as in daydreaming about strolling through the streets of Rome or lounging on the beach in Stone Harbor. And again, its not that I mind Texas, its just that I miss NJ and even ( gasp!) Minneapolis ( one year ago I never thought I'd say that). And yes, I know that probably by this time next year I'll be loving Texas just as much as any other place I've ever lived, but right now, its just okay.

As is always the case when you move, it takes a certain amount of time to adjust. And the other day I was just about at my melt-down point. We live in a beautiful apartment which is so different from any apartment I've ever lived in because it is nestled in a super-community of condos and apartments all of which are snuggled right up next to each other. The benefits are great- the kitchen is beautiful, we have not one but two pools, and the grounds are amazingly green, even in this terrible heat. The downsides are little things, like cable and internet that just don't work ( this post has been a two day effort due to varying wireless service), which all seem to add up when you are constantly on the phone trying desperately to remedy the situation. Which is exactly where I was on Thursday.

After spending one hour on the phone with the internet company ( apparently not only the internet service is slow) I'd about had it. So I decided to make homemade pasta. I realize that sounds funny, but people are comforted by all sorts of things, and my biggest comfort is making things by hand. Since we needed to have dinner, I figured I'd kill two birds with one stone and whip up some pasta. When I saw the five pound bag of potatoes untouched in my kitchen, I decided gnocchi were on the menu.

And soon I was smashing the potatoes ( and my frustrations) through a ricer and rolling them out with flour and an egg yolk. Frankly, it was fun, and I was happy knowing that Gian Luca would be pleasantly surprised when he come back from work.

As the gnocchi was cooking I made a quick sauce by heating some extra virgin olive oil and garlic and tossing in some slices of fresh tomato. I finished it off with some basil from my garden ( another benefit of Texas).

Just as I was loving life, the sink decided to regurgitate someone else's food ( ah the joys of apartment living). The entire sink clogged and up floated a straw and a plastic knife ( how is that even possible?). Luckily it didn't overflow, so I didn't break my stride. I just turned my back on that sink and focused on the stove.

When Gian Luca came home he was so happily surprised by the gnocchi, that I don't think he minded the fact that after dinner he'd be plunging out the sink.

And as we were eating I realized that I really did enjoy the gnocchi- I wasn't dreaming of anything else this time. And if I could learn to love that pasta, surely I could learn to love the great state of Texas. It might just take a while, but I'm hanging in there.

* sorry there are no pictures for this post- the internet is too slow to upload them. :)

Graziella's Potato Gnocchi
Serves 2-4

4 russet or Idaho potatoes
1 egg yolk
1 teaspoon salt
1 1/2 cups flour
1/4 cup grated parmiggiano cheese
1/4 teaspoon of nutmeg *

* optional

1) Boil peeled potatoes in salted water until soft.
2) Mash hot potatoes through a ricer or food mill into a large bowl. Let cool slightly.
3) Add egg yolk, salt, nutmeg, cheese and flour. Mix well and turn out onto a lightly floured work surface.
4) Knead into a ball of dough. The mixture should be soft and pliable. If it is too sticky add a little more flour.
5) cut 1/16th of the dough and roll into a rope about 1/2" thick. Cut the rope into 1" pieces.
6) (This step is optional) Make an indent with your thumb or the back of a fork ( of the dull side of a cheese grater) into each gnocchi ( this will allow sauce to coat the gnocchi.
7) Fill a large pot with salted water and bring to boil. Add gnocchi.
8) When they float to the surface cook them for an additional minute then remove with a slotted spoon or strainer.
9) serve with your favorite sauce.

The gnocchi are best served fresh, but the uncooked gnocchi can be frozen for up to one month.

Enjoy!

Tuesday, July 20, 2010

Along the Way


Yesterday was one of those miraculous days where I effortlessly crossed off all the things on my to-do list. And I had a lot to do. Since moving to Texas I feel like I've been running a mile a minute trying to get things all in order. But now that I have a second to breathe, I'd like to share a very important topic with you all. BBQ.

Now I know what you're thinking, and trust me, I'm not converting to Texas cuisine just yet. In fact, we don't even have a BBQ in our apartment. But since we did just drive 1,400 miles south, I figure I need to pay tribute to some good old cookin'. And that's just what we did in Memphis.

Some people might think its strange to plan your travel route based on food, but I'm sure none of you reading would think we were weird for doing so. Especially when the reward is world famous BBQ. And the stop is technically along the way. Yes, I'm talking about Charles Vergos' Rendezvous BBQ. Some of you may have seen the restaurant on TV or read about it in a travel magazine, and I'm here to verify that it was THAT good.
We planned our trip to make it there by 5 since they don't take reservations and there's always a wait (I and since we still had 2 hours of driving to do after dinner). We were lucky to get there when we did, because just minutes after we were sat, the line grew and eventually was wrapped around the block.
The ribs are the most popular item, so we both went right for them, and in about five minutes we were served the famous dry rubbed ribs. I was surprised by the lack of sauce, but as the menu says, the ribs are so good, you don't need sauce. They weren't lying either. Those ribs were so good Gian Luca ordered a second order.

And as we got back into our car for the rest of the drive, we felt happy and fully welcomed to the south.

Monday, June 28, 2010

A month without cooking

Hello blogger friends. It's been a while.
And as you can see from the title of this post, I've been out of the kitchen for a while too.. but all for good reason.
Gian Luca and I have been in transit; a few weeks ago we moved out of Minneapolis and took off for Italy. After two incredible weeks with family and friends we landed in New Jersey to stay with my parents. We're here for another week, most of which will be in Stone Harbor, helping out at my brother's restaurant Ristorante Luciano ( I promise I'll post pictures soon). Then its off to Texas.

Since I've been out of the kitchen, I only have two little photos from our trip to Italy.

The first is of Montepulciano, Gian Luca's home town in Tuscany, where we spent the first part of our Italian vacation with his parents and friends. From there we traveled to Prato for our friends' wedding, then to Pienza, San Quirico d'Orcia, and finally Siena.


Then we hopped on a midnight but to go down to Salandra, my mother's hometown in Basilicata, where we spent four days with my family.

The second picture is from Matera, a city in Basilicata famous for i Sassi, homes carved out of the mountainside.
I promise I'll be back in the kitchen soon! Ciao ciao!

Thursday, May 13, 2010

Better with Butter


Now I'm no Julia Child, in fact, I generally cringe when a recipe calls for butter. Although I don't mind the taste, I just don't like cooking with butter, especially frying in butter. My arteries seem to clog at the thought of it.

But I do admit that somethings are better with butter. Take for example, a scone. The crumbly, flaky dough is only possible with butter or ( heavens no!) shortening. And while I'm hesitant to cook anything in butter, I love baking with it. So of course, when I saw this recipe for Apricot Oat scones in Martha Stewart's Baking Handbook, ( which Gian Luca got me for our anniversary) I didn't even hesitate at the whole stick and a quarter that the recipe calls for. In fact, I took pleasure in crumbling it with my fingers, watching the flour and oats transform into a course grainy texture with the magic of butter.

Then this morning, when we bit into the scones, we smiled, as if to say, ahhhhhh butter.


Apricot Oat Scones
from Martha Stewart
makes 8

1 cup oats ( old fashioned or quick-cooking)
3/4 cup all purpose flour, plus more for dusting
1/2 cup whole-wheat flour
1/4 cup plus 2 tablespoons sugar
1 1/2 teaspoons baking powder
1/2 teaspoon baking soda
1/2 teaspoon salt
1 1/4 sticks ( 10 tablespoons) unsalted butter, cold, cut into small pieces
1/2 cup diced dried apricots ( cut into 1/4" pieces)
1 large egg, plus 1 large egg yolk
1/2 cup buttermilk
1 tablespoon heavy-cream
Sanding sugar, for sprinkling ( optional)


1. Line baking sheet with parchment paper; set aside. In a large bowl, whisk together the oats, the all purpose flour, the whole wheat flour, sugar, baking powder, baking soda, and salt. Using a pastry blender, cut in the butter until the mixture resembles course crumbs with a few larger clumps remaining. Fold in apricots.

2. Whisk together the whole egg and buttermilk. Add egg mixture to the flour mixture; using a rubber spatula, fold in, working in all directions and incorporating crumbs at the bottom of the bowl, until the dough just comes together.

3. Turn out the dough onto a lightly floured work surface. With lightly floured hands, gently press and pat the dough into a rectangle, about 1 1/4 inches thick. Using a sharp knife or a pastry wheel, cut into eight triangles. Place triangles about 2 inches apart on the prepared baking sheet; cover with plastic wrap and freeze until the dough is very firm, at least one hour or overnight. ( At this point, you can freeze the unbaked scones in a resealable bag until ready to bake, up to three weeks.)

4. Preheat the oven to 375 degrees. In a small bowl, lightly beat the egg yolk with the cream; brush over the tops of the scones, and sprinkle generously with sanding sugar, if using. Bake, rotating the sheet halfway though, until the tops are golden, 25 to 30 minutes. Transfer to a wire rack to cool. They are best eaten the day they are baked.

Saturday, May 8, 2010

Ugly Ducklings


I'm reading Elizabeth Berg's newest book, The Last Time I Saw You, a novel about a group of people who get together for their 40 year high school reunion. It's very cute and entertaining to think that people still live the roles that they played in high school.
Though the novel enters into the minds of several characters ( each chapter focuses on a different one) I find myself rooting for Mary Alice the "ugly duckling". I like her because she doesn't grow up to be a swan like in the fairy tale, but does gain a slew of confidence in the 40 years since graduating high school, and goes to the reunion with her head held high.
Okay, so why am I telling you this? Because when I get into a book, I really place myself in it. I've been that way since the third grade, when my teacher, Mrs. Compton, kindled a love of reading in me ( and probably all of her students). I am usually never without a book in hand (or at least a magazine). But this book, and the concept of ugly ducklings does actually have something to do with the nubby little things pictured above.
I've never met a vegetable I didn't like. But I have met quite a few that I am scared of, mostly because I have no clue what to do with them. These are usually of the neutral, gnarled variety that I speed by on my way to the tomatoes in the grocery store. You know the ones. You probably walk by them too.
So when my friend Erica came into work the other day with Jerusalem Artichokes ( also known as sunchokes) I was intrigued. I'd heard of them before, maybe even seen them on an episode of Chopped but I'd never tasted them.


Erica, a bubbly vegetarian with a great big heart, eagerly offered me a piece, and with one taste I was hooked. The flavor was like a combination of potatoes and artichokes, only with a rich nuttiness. She sauteed hers in butter and topped them with toasted sunflower seeds which added to their inherent smokiness.
Erica told me they looked like ginger roots, so the next day in the market, I looked for them. And there they were, the ugly ducklings of the isle, surrounded by popular green leafy vegetables, and plump ripe tomatoes. But I knew better they to bypass these babies.
Today I did a quick Google search for recipes and surprisingly, I hardly found any. I improvised and came up with the recipe you'll find below. Give them a try, and if you have a recipe for them, please pass it along. These might be my new addiction!

Oh, two more things:
1) Happy Mother's Day to all the mothers out there! You are so special! I know without my mom, I would not be the person I am today. And now, I have a wonderful mother-in-law, who is like a second mother to me. I'm so lucky to have them both in my life. I hope to be a mother just like them some day. There they are- aren't they cute??


2) Tomorrow is Gian Luca and my First Wedding Anniversary!! I am so lucky and blessed to be married to him!


Ok, now for the recipe:

Jerusalem Artichokes

Serves 4


8 medium Jerusalem Artichokes ( sliced into 1/8" pieces)
1/2 medium onion ( chopped)
2 tablespoons of extra virgin olive oil
1 teaspoon butter
salt and pepper to taste

1) Blanch Jerusalem Artichokes in boiling salted water until firm but tender ( about 5 minutes). Drain and set aside.
2) In a medium skillet, heat olive oil. Add onions and Jerusalem Artichokes, salt and pepper to taste. Lower the heat and allow to simmer until the onions caramelize and the artichokes brown a bit ( about 3-5 minutes)
3) Add the butter and cook for an additional 2 minutes.

Enjoy!

Wednesday, May 5, 2010

Little Darlings


Wow- what a whirlwind April was! Remember when I told you way back when that Gian Luca and I got some really great news? Well, it's time to share: we'll be moving to Texas! Gian Luca got his dream job there and we'll be relocating in two months. So between traveling to Denver

I was so happy last Saturday because I actually had the chance to spend the day in the kitchen baking, which is what I love best. We'll be leaving Minneapolis in a month and we have cabinets full of ingredients for baking which I won't be taking with me. The only reasonable thing to do was to spend the afternoon making 100 mini cupcakes to take to a pot-luck on Sunday. I'm a reasonable girl, so that's exactly what I did.
for my conference and Texas to look for places to live, I barely had enough time to eat, let alone cook. But that seems to be the case with my life right now. It's all rush rush rush, and it's not going to stop for a few more months. But it's all good.


A gigantic tub of Nutella was among the ingredients that we needed to use up, and while I dreamed of eating a thick slabs of bread smeared with the creamy chocolate hazelnut spread for breakfast every day for the next month, I knew that was not going to happen. Instead, I used the entire tub to make Nutella Cupcakes with Chocolate Ganache and Nutella Buttercream. The Nutella surfaced three-fold in these little darlings. It got mixed in the batter, squirted inside each baked cupcake, and piled high on top. The result: insanely rich chocolate goodness, similar to a Ferrero Rocher candy. Try them for yourself, but trust me, you'll be hooked.


Mini Nutella Cupcakes

adapted from How to Eat a Cupcake
Makes 24 minis and 6 regular

1 3/4 cups all-purpose flour
2 teaspoons baking powder
1/2 teaspoon salt
1/2 cup (1 stick) unsalted butter, softened
1/2 cup sugar
3 eggs
3/4 cup Nutella
1/4 cup milk

Ganache
8 oz. semi-sweet or milk chocolate chips (or both)
1/2 cup heavy cream
1/3 cup chopped, toasted hazelnuts

1. Preheat oven to 350 F. Line mini muffin pan with paper or foil liners.
2. Mix flour, baking powder, and salt together and set aside.
3. Cream butter and sugar until light and fluffy (2-3 minutes) . Add eggs, one at a time, mixing well after each addition. Add 3/4 cup of Nutella and blend thoroughly. Alternately add flour mixture and milk, blending well after each addition (Don't overmix! Blend only until no traces of flour remain.)
4. Using a tablespoon, fill each cup with batter. Bake for 10-12 minutes or until a tester inserted into the center comes out clean. Remove from oven and cool on wire racks.
5. When cupcakes are cool, fill them with the remaining Nutella.
6. Make the ganache. Put chocolate chips and cream in a microwave-safe bowl. Microwave on high for 45 seconds to 1 minute, depending on your microwave. Stir gently with a rubber spatula. Heat for 15-20 more seconds. Stir until well blended. Stir in chopped hazelnuts and dip cupcakes into ganache. Let cool on a wire rack.


Buttercream


2 sticks of butter ( softened)
2 1/2 cups powdered sugar
3/4 cup Nutella

1) Cream butter. Add Powdered sugar and Nutella. Stir until combined.
2) Place buttercream into a pastry bag and pipe on top of cupcakes. Or spread buttercream on with a knife.

Monday, April 12, 2010

A Slice of the Pie


I'm a traditionalist, especially around the holidays. So this year, since we were not going back to New Jersey for Easter, there was no question that I'd make my mother's Pizza Rustica, a savory pie made with sausage, eggs, and lots of cheese.


Traditionally eaten for Easter breakfast, Pizza Rustica is packed with hearty, filling goodness which oozes out of each slice. Growing up, we used to anxiously wait for Easter morning to have a slice of the pie, and though I do love traditions, this year, we just couldn't wait.

Luckily, we were invited to a friend's house for an Easter Vigil party, so I was able to bring a small pie which we all devoured at around midnight. Well, I guess it was technically Easter morning.


Anyway, there's no need to wait until next Easter to make this delicious treat. I have a feeling I'll be making it again very soon.


Pizza Rustica
Makes two 9" pies or one 16" pie

For the crust:

1 stick of butter ( melted and cooled to room temp)
1 egg
3/4 teaspoon of salt
1/2 teaspoon baking powder
3 cups of flour
1/2 cup of ice water


1) In a large bowl beat together the egg, cooled butter, and salt
2) slowly add the flour and baking powder. Mix well. The dough will be very dry and crumbly.
3) slowly add 1/2 of the ice water and mix. Add the rest as needed. The dough should feel moist and slightly greasy.
4) cover in plastic wrap and set aside for at least 30 minutes.


For the filling:
4 hard boiled eggs, sliced
3 lbs of Italian sausage, crumbled and cooked through.
1 lb of farmer's cheese or mozzarella cheese ( grated)
1/2 cup pecorino romano cheese ( grated)
1 egg beaten


Assembling the pie:

1) on a floured surface roll 1/4 of the dough ( if making two pies, 1/2 of the dough if making one large pie) to 1/16" thickness. Lay over a greased cake pan, making sure the edges hang over about 1/2".
2) Fill the pie crust with layers of sausage, hard boiled egg, farmer's cheese, and pecorino cheese. When the pie is full, beat one egg and pour almost all of it on top of the filling. This will bind the pie. Save just a small amount to brush over the top of the crust.
3) Roll 1/4 of the dough to 1/16" thickness and place over the pie, making sure that the edges hang over about 1/2 ".
4). Fold the sides over to create a lip and pinch the dough between your thumb and pointer finger to close the sides. ( see picture above)
5) Cut slits into the pie crust to allow air to exit during baking.
6) Brush the top with the beaten egg to give the pie a nice golden crust.
7) Place in a 375 degree oven in the center rack and bake until golden, ( about 35-50 minutes)
8) Serve hot and enjoy
-- the pizza rustica can be frozen for up to a month. Defrost it at room temp and then heat in a 375 degree oven until hot.

Saturday, April 10, 2010

Cipolliness

Hello everyone!
I've been in Denver for the AWP conference and have had a terrific time talking to writers, agents, publishers and fellow bloggers.
I've been so happy that I decided to create Cipolliness - a blog featuring the little things that make me happy each day.

Thank you for being patient with me- I'll be back to cooking tomorrow, I promise!

Sunday, March 21, 2010

Pici -"Oh Wow"


First of all, let me apologize for neglecting my blog, all of my blog friends, and all of your sweet comments. I've been spread so thin lately that I can barely manage to cook, and when I do, it's noting worthy of posting. But I do really appreciate all your support, and even when I don't respond to a comment, please know that each and every one brings a smile to my face.

As I just mentioned, I've been busy, really busy. March has been totally crazy and I've been living my own personal "March Madness" between work, my internship and editing my book. But I have a goal for myself: I'll start sending my book out to agents ( know any good ones?) by April 1st- and so far, I seem to be on track, even if it means waking up at 5 am to revise for a few hours before going to work.

But enough about that, let's get to the food. You're probably wondering about the title of this post, like- what are Pici? and why do they get an "oh wow"?

Pici are a hand rolled Tuscan pasta, similar to a really really thick spaghetti, made with semolina flour and lots of love. The "Oh wow" part comes right from Gian Luca's mouth, as I opened the fridge this evening and took out my day's work for him to see.

He's been talking about Pici for months now and we never had the time to buckle down and make them. But this afternoon, when I opened up the freezer and saw the lonely pint of Ragu just hanging out, I decided today was the day. There it was, the perfect reason to procrastinate staring me right in the face.

And, since Janelle of Talk of Tomatoes proposed a pact that we start making our own pasta, I really had no excuses did I? So girl, I'm tagging you now- you're it! ( Anyone else want to join us?)

So if you need to procrastinate, or you're just in the mood for some delicious pasta, give these a try. I promise you'll be saying "Oh wow" too.


Pici
( Makes 4 servings)

1 cup all purpose flour
1 1/4 cup semolina flour ( plus more for dusting)
3/4 cup tepid water


1) On a clean work surface, make a well with the two flours
2) Slowly add the water to the middle of the well, incorporating flour from the center of the well until a wet dough forms. Knead in the rest of the dough, adding more water if the dough is too dry. Knead together to form a ball.
3) Place the dough ball aside and clean your work surface. Scrape up and discard any dried dough bits.
4) lightly flour your work surface again and knead the dough ball for a good 10 minutes using the palms of your hands ( think of it as a workout). The dough should be elastic and slightly sticky.
5) Wrap dough in a plastic bag and let it rest for 30 minutes.
6) Remove dough from plastic bag and pinch off one inch of dough. Begin by rolling the dough into a log in the palm of your hands, then place the log on your work surface and roll outwards, pressing gently with your palms. Roll the dough out until it is a long, thin strand, about 1/16th of an inch thick. This will take some practice, so don't worry if all of your pici come out to be different sizes.
7) Lightly dust a cookie sheet with flour and place the finished pici on that, careful not to let them stick together. Repeat with the rest of the dough. ( Refrigerate the pici if you won't be using them for a few hours. For anything more than 1 day, pop them in the freezer.
8) Bring 8 cups of water to boil. Add 2 tablespoons of salt and one teaspoon of olive oil to the boiling water. This will flavor the pici and allow them not to stick together. Add the pici and cook until cooked through, ( about 5- 10 minutes depending on the thickness of your pasta).
9) Drain and serve with ragu and pecorino cheese.
10) say "Oh wow" just to make me feel good :)

Saturday, March 6, 2010

Orecchiette with Shrimp and Broccoli di Rape


Lately I've been thinking a lot about my aunts, uncles and cousins in Italy. Its been almost three years since I've been there to see them, and even though we can connect through Facebook and Skype, there is nothing like being there in person to sit around a big lunch table, talk, laugh and eat loads of homemade food.
Obviously I love going back to see them, but I also love going back to eat, and my aunts all know exactly what I crave and find a way to make my favorite dishes. My Zia Anna always makes her Crostata di Ricotta, with her homemade ricotta cheese that is like no other I've ever tasted. Zia Guiseppina make her panzarotti, which, when we were kids, we'd fight over. Zia Lena makes spectacular pastas with the wild mushrooms that my Zio Vincenzo collects on his morning walks through the woods, and finally, Zia Maria, my Godmother, makes her Orecchiette.

Zia Maria is a specialized pasta maker. I've seen her work and she's methodical but has that certain rhythm that can only be seen when one is really enjoying her work. She sets out her wooden board, coated with years of flour, on the counter near her window. There she works, always taking time to chatter with neighbors as they pass, watch her grandchildren play in the street outside, and wave her husband in from the cold. She does this almost every day, and it is comforting to think that even now as I write this post, she is probably at her window, rolling out dough and shaping the "little ears" with her thumb.
I rarely make my own pasta. I love doing it, but most days there is not enough time, so we have to be content with dried pasta from the grocery store. Luckily, with the right sauce, the pasta still has the ability to transport me to the streets of Salandra, where I am walking outside of my Aunt's window, waving to her as she works.


Orecchiette with Shrimp and Broccoli di Rape
Serves 4
3/4 pound of orecchiette
1 pound of Broccoli di Rape
1 pound shrimp ( peeled and cleaned)
4 tablespoons extra virgin olive oil
2 large garlic cloves
1/2 cup dry white wine
1/2 teaspoon lemon zest
1/4 teaspoon red pepper flakes
salt and pepper to taste

1. Bring 3 quarts of salted water to boil. Add Orecchiette and cook according to package directions.
2. Cut Broccoli di Rape into small pieces and blanch in boiling salted water for 5 minutes ( this will remove all the bitterness)
3. In a medium saucepan, heat the olive oil. Add the garlic cloves and red pepper flakes. When the garlic beings to brown, add the shrimp and cook until they turn pink. Add the white wine and simmer for 3 minutes. Add the blanched broccoli di rape, salt and pepper to taste. Allow to simmer together for another 3 minutes.
4. Drain the pasta and add to the saucepan. Stir to coat the pasta in the sauce. Top with the lemon zest. Serve hot.

Wednesday, February 17, 2010

Souffle for Two


I'm terrible at Math. I've never liked the subject and, in school took the minimal amount of Math possible to graduate. That means I only took three years in high school and one measly semester in college, and let me tell you, they were both a long time ago.

Yet, math seems to always rear its ugly head my way. Like when I was a Senior in college and had to take the GRE for grad school, or when I'm trying to convert recipes from the metric system to our measurements. Luckily, I married an engineer who loves math, so Gian Luca usually takes care of all of the mathematical requirements in the house.

But yesterday, in honor of Mardi Gras, I wanted to surprise him with chocolate souffles. Now, I know that sounds daunting, but I am a self proclaimed souffle queen, and nothing about the process is scary to me. That is, until I realized that unless I wanted to make 24 souffles, I'd need to do a little math.

See, a normal batch for me would be 24 souffles, because I am used to making restaurant quantities of these guys. I don't even have the recipe written down, because, for six summers of my life, I'd unlock the door to my brother's restaurant at 9 am, turn on the lights to the empty kitchen, hook up my Ipod to listen to some U2 and whip up a batch before hitting the beach. In less than an hour, I could make 24 souffles and be out the door before the prime hours of sun hit. And, I did this seven days a week. So I never even had to think of writing down the recipe until yesterday.

First of all, we don't even own 24 souffle cups, so of course, making a whole batch was not an option. But I vaguely remembered that the original recipe started out as one for 8 souffles. Still too many for us, but at least that would be manageable.

I scoured the apartment for a calculator but was not able to find one, so I figured I could divide on my own. If a 6th grader could do this math, so could I. I grabbed my pen and paper, writing down the recipe for 24, them dividing it by 3, then finally dividing that by 4 to get the lonely two souffles which we would enjoy.


I was skeptical- what recipe calls for 1/2 a tablespoon of butter? And how in the world would I fluff up one egg white?

I pulled on an apron and turned on some U2 for good luck.

Low and behold, the batter looked and smelled fine ( and the lonely egg white did whip up just fine). And when we baked them hours later, they rose in all their splendor, just like a normal souffle at my brother's restaurant. And, given the mathematics that I went through to make them, they tasted even better.

Chocolate Souffle
This recipe yeilds two souffles. It can easily be multiplied to make any amount necessary.

2 ounces of semi-sweet chocolate
1/2 ounce of unsweetened chocolate
1/2 tablespoon of butter ( plus more for coating the souffle cups)
1/2 tablespoon of flour
1/4 cup milk
1 tablespoon sugar ( plus more for coating the souffle cups)
1 egg ( separated)
1 teaspoon powdered sugar


1. Coat the inside of two souffle cups with butter, making sure to get the sides and the top rim. Roll sugar in the cups, making sure to coat the entire inside, sides, and top rim. This will allow the souffle to rise.

2. Chop the chocolate into small pieces to make melting easier.

3. In a small saucepot, melt butter over a low flame. Add the flour and stir until it forms a paste. Add the milk and stir to form a roux. ( Make sure that all the flour/butter mixture has melted into the milk. If needed add a tablespoon more milk.) Stir until thick.

4. Add the sugar and chocolate and stir until the chocolate melts. Remove from flame. Transfer the chocolate mixture into a bowl and allow to cool slightly.

5. Add the egg yolk to the chocolate mixture and stir well.

6. In a separate bowl, whisk the egg white until it forms a soft peak. Add the powdered sugar and continue mixing until it forms thick peaks.

7. Slowly fold the egg white into the chocolate mixture, being careful not to deflate the white.

8. Pour batter into prepared ramekins. At this point the souffles can be refrigerated until ready to bake. They are best baked the day they are made, but will keep in the fridge for up to three days.

9. To bake the souffles- preheat oven to 400 degrees F. Place the souffle dishes on a baking sheet ( this makes removing them so much easier). Bake on the middle rack for 25-30 minutes.

10. Top with powdered sugar and serve with vanilla ice cream and strawberries. Enjoy!

Sunday, February 14, 2010

A Valentine


Happy Valentine's Day!
Gian Luca and I have been celebrating all week ( which may explain why I have not posted)!
Our celebrating started early in the week when we got a big surprise that has kept smiles on our faces this whole week ( sorry, I won't say what it is just yet).
Then, on Wednesday, when I came home from work, I found a huge package from my parents on our doorstep. My brother Joe is an actor and a member of SAG so I knew my parents were sending me a bunch of movies that he gets to review ( and we all get to watch) but I had no idea what could have possibly made up the other ten pounds in the box. My first thought, cookies.
My mom loves to bake even more than I do and it seemed logical that she'd send some our way.

Link
Well there were some Biscotti di Prato inside the box, but she didn't stop there. She sent a humongous jar of Nutella, perfect for making these, a box of Ferrero Rocher candies ( Gian Luca's favorite), some amazing scallion and black olive stuffed focaccia ( I promise I'll get the recipe soon), and all the fixing for my favorite soup- Stracciatella.

That's right, my mom sent me frozen blanched escarole and frozen mini-meatballs so that I could combine them with chicken stock and an a few eggs and enjoy a little taste of home.
It was by far the best care package I've ever gotten. How is it that moms just know?


Stracciatella is also know as Italian Wedding Soup, though, growing up we never referred to it as anything but Stracciatella ( which, by the way, is also the name of a very popular gelato flavor).

Stracciatella Soup
There is no recipe for this soup, just a few instructions and links to other posts. Enjoy.

For Chicken Stock click here
For the meatballs click here just be sure to roll the meat into tiny tiny balls ( about 1/4 inch round). They cook up faster than the larger ones so keep your eye on them.

For the soup:
2 quarts of chicken stock
2 cups mini-meatballs
1 head of Escarole- chopped and blanched.
2 large eggs- beaten

In a large stock pot, heat chicken stock, 2 cups mini-meatballs and escarole. Bring to boil.
Add beaten eggs into the soup and stir. Let simmer for an additional 3 minutes. Top with freshly grated cheese and enjoy with crusty bread!