In honor of Small Business Saturday, my ebook, The Queen of Minor Disasters, is available for FREE on amazon!
Get it here http://www.amazon.com/dp/B009WWNZBS

Saturday, November 24, 2012


Friday, November 16, 2012
The Queen of Minor Disasters
Hello everyone!
I know it has been so long ( over a year!) since I posted, but I'm back with a big announcement!
My ebook, The Queen of Minor Disasters is available on Amazon now.
The Queen of Minor Disasters is a fast, fun, chick-lit novel with recipes!
Get it here

I know it has been so long ( over a year!) since I posted, but I'm back with a big announcement!
My ebook, The Queen of Minor Disasters is available on Amazon now.
The Queen of Minor Disasters is a fast, fun, chick-lit novel with recipes!
Get it here
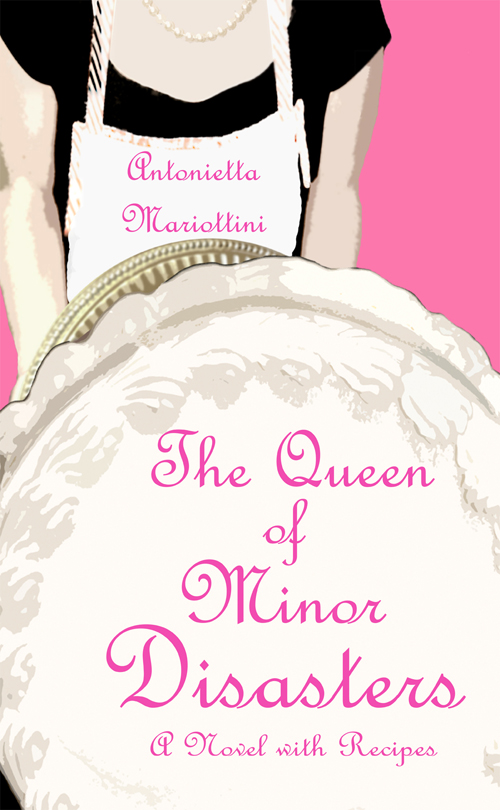
About the book
Stella DiLucio is the master of fixing other peoples’ problems. After all, the sassy twenty-seven- year old manages her brother Lorenzo’s restaurant on the Jersey Shore. With the help of a little “Food Therapy” Stella can evade meddling mothers, face frenemies, confuse gossiping locals, and smooth out family conflicts, all while keeping a smile on her face. But when Stella gets thrown a major curve ball, her life starts to unravel. Will the queen of minor disasters be able to set her own life straight?
Join Stella as she deals with her quarter-life crisis, runs the family business, and ultimately figures out what she wants in life. Full of unexpected twists and turns, outlandish characters, and inspiring recipes, this laugh-out-loud novel will take you behind the scenes of the restaurant business, whetting your appetite, and making you beg for seconds.
About the Author
Stella DiLucio is the master of fixing other peoples’ problems. After all, the sassy twenty-seven- year old manages her brother Lorenzo’s restaurant on the Jersey Shore. With the help of a little “Food Therapy” Stella can evade meddling mothers, face frenemies, confuse gossiping locals, and smooth out family conflicts, all while keeping a smile on her face. But when Stella gets thrown a major curve ball, her life starts to unravel. Will the queen of minor disasters be able to set her own life straight?
Join Stella as she deals with her quarter-life crisis, runs the family business, and ultimately figures out what she wants in life. Full of unexpected twists and turns, outlandish characters, and inspiring recipes, this laugh-out-loud novel will take you behind the scenes of the restaurant business, whetting your appetite, and making you beg for seconds.
About the Author
Antonietta Mariottini has an M.A. in Creative Writing from Rutgers University
and has taught writing at the high school and college levels. Before writing
this book, she managed her brother's restaurant for seven summers. She is now a
proud stay-at-home mom who writes when her baby is sleeping. This is her first
novel.
For more info, please visit antoniettamariottini.blogspot.com or thequeenofminordisasters.blogspot.com
For more info, please visit antoniettamariottini.blogspot.com or thequeenofminordisasters.blogspot.com
Where to buy it
Get The Queen of Minor Disasters as an ebook on Amazon for
just $2.99
Don’t have a Kindle?
You can read this and other Kindle books on your computer,
smart phone or tablet by downloading the free Kindle App from Amazon
Friday, September 23, 2011
Still Summer Salad

Has it cooled down where you live?
Here in Texas it has ( instead of being in the 100's we are now in the nice cool 90's). So it's clear, September is still summer, even if the official first day of Fall is today.
Truth be told, I'm enjoying the "summer" more now than I did in July. It's still unbearably hot, but now the mornings carry a nice cool breeze and the evenings aren't so sticky. Plus, I can actually go swimming without feeling like I'm sitting in a bath tub ( always a plus).
So since summer is still in full swing ( regardless of what the calendar says) I figure this salad is pretty perfect. It has the color and crunch that we crave when the weather is down right hot, and has the perfect lemony tang that makes you want to sit in the shade.
Even if it's getting colder where you are, you'll still want to try this one out. One bite, and you'll be back on the beach.
Summer Salad
adapted from a recipe by Giada Di Laurentis
Serves 2
1/2 pound of sugar snap peas
2 large cucumbers, peeled
2 large tomatoes ( I used Roma, but any type will do)
Juice of one lemon
2 tablespoons olive oil
salt and pepper to taste
1) Blanch the snap peas in salted boiling water for 2 minutes. Drain and immediately immerse the peas in an ice bath. This will keep them crunchy.
2) Dice the tomatoes and cucumbers. Combine with drained sugar snap peas in a large bowl. Top with salt and pepper. Toss
3) In a separate bowl, whisk oil and lemon juice together. Pour over salad. Toss and enjoy.
Friday, September 16, 2011
a new recipe and a big announcement

This time I have a valid reason for my absence.
Drumroll please......
I'm pregnant!!!!
We found out right when we got home from Greece, and even before the doctor confirmed it, I was feeling the woes of the first trimester full force.
Most nights I shied away from cooking, but on the rare event that I did turn on the stove it was only to make bland white rice, or eggs. Sometimes a sandwich or two would sneak into the pregnancy repertoire, but certainly not one worth mentioning ( because you all probably make a better grilled cheese than I do).
And that's how it went for three months.
Then, last month I visited my family in New Jersey and satisfied all of my pregnancy cravings which could not be fulfilled in Texas ( namely a Philly soft pretzel and an Italian pastry from south Philadelphia.) My mom even make me a treat which I hadn't had since I lived in Rome-white pizza topped with zucchini flowers, anchovies, and mozzarella. It didn't last long enough to take a picture though.
Being around all the great food, great family, and great friends made me my nausea disappear. And once I felt better, my brother Luciano put me to work at his restaurant at the Jersey shore.

Of course, there were many perks to working there. One night, Luciano created this fusilli pasta special that I devoured. When I came back to Texas I couldn't wait to recreate it for Gian Luca.
The verdict- it's a winner!
Fusilli with sausage and porcini mushrooms
serves 4
2 tablespoons extra virgin olive oil
1 clove of garlic
1 pound hot Italian sausage, casing removed
12 dried porcini mushrooms, diced
1 12 oz can of diced tomatoes
1 pound of fresh fusilli pasta ( dry will work too)
1)rehydrate the porcini mushrooms in one cup of warm water for 30 mins. Save the water.
2) Heat the olive oil in a large saucepan. Add the garlic and simmer until golden brown. Remove the garlic.
3) Add sausage into the pan and break it up into pieces with your spatula. Allow sausage to brown and then add the reserved porcini water and mushrooms.
4) Add the diced tomatoes and lower the heat, allowing the sauce to simmer for about 20 minutes.
5) Cook the pasta in a large pot of boiling salted water, until al dente.
6) Add the pasta into the saucepan and toss until the pasta is coated.
7) Add grated pecorino and chopped parsley to taste.
Thursday, June 9, 2011
where I've been
 Hello Blog friends-
For starters, my apologies for disappearing for over 2 months!
One minute I was counting down to my 30th birthday and the next minute it's June 9th...
So just to recap what's been going on over the past two months-
I've been grading papers and wrapping up the semester-
Writing, sending to agents, and waiting-
taking care of our new Kitten-- (an adorable rescue named Schiuma)
and vacationing in Crete!
But now we're back in Texas and ready to roll. I promise some Greek recipes soon.
Ciao!!
Friday, March 25, 2011
6 days to the Big 3-0
As if the Bronx wasn't culturally diverse ( and sometimes shocking) enough, I decided, as a Sophomore in college, to go to Jamaica.
Now, I know what you're thinking-- who cares, a lot of college students go to Jamaica for spring break.
But my trip was vastly different. Instead of staying in a resort in Ochos Rios or Negril, my group stayed in a dorm in Kingston.
This trip was not about lavish beaches, tanning by a pool, or dancing until the early hours in the morning. This trip was about serving others.
Fordham University had a student run group called Global Outreach, whose main purpose was to organize volunteer trips during winter or spring break. I liked the sound of that, and while I wasn't brave enough to apply to the trip in India or Africa, I did muster up the courage to apply to Jamaica.
After a series of interviews, I was chosen to spend two weeks of winter break in Kingston with the eleven other students who made the "team". To prepare for the trip we met once weekly to talk about things we would encounter, to reflect on our week, to pray, and to organize the details. Only one girl had been to Kingston before, and she offered all the advice she could give.
But nothing could really prepare us for what we'd see. Jamaica is a third world country and was, at that time, engulfed in civil unrest. ( In fact, ours was the last trip to Kingston, as the city is too dangerous).
But amidst the crime, the poverty, images of starving children in the streets, and the sweltering heat, was one of the most touching moments of peace and beauty in my life.
We were blessed to work with the Missionaries of Charity in Kingston, and just seeing how these sisters devoted their lives helping the poor was overwhelmingly beautiful.
The residents in the Home for the Dying and Destitute were mostly older people, picked up off the streets and brought in the shelter for their dying days. But instead of fear and dismay, the walls were filled with love, laughter, and songs.
In addition to the Missionaries of Charity, we volunteered at a grade school, helping the teachers and principal with the lessons.
To thank us, the teachers threw us a dinner party, full of Jamaican favorites, including Akee and Saltfish, the dish they were raving about for days before the dinner.
As we were getting ready for the dinner, I remember feeling guilty for even having a party. It seemed odd to me to want to party after all we had seen there. When I told this to our group leader she replied, " you need to accept the gifts you're given."
So I did.
ACKEE AND SALTFISH (COD) RECIPE- Photo and recipe taken from here
Now, I know what you're thinking-- who cares, a lot of college students go to Jamaica for spring break.
But my trip was vastly different. Instead of staying in a resort in Ochos Rios or Negril, my group stayed in a dorm in Kingston.
This trip was not about lavish beaches, tanning by a pool, or dancing until the early hours in the morning. This trip was about serving others.
Fordham University had a student run group called Global Outreach, whose main purpose was to organize volunteer trips during winter or spring break. I liked the sound of that, and while I wasn't brave enough to apply to the trip in India or Africa, I did muster up the courage to apply to Jamaica.
After a series of interviews, I was chosen to spend two weeks of winter break in Kingston with the eleven other students who made the "team". To prepare for the trip we met once weekly to talk about things we would encounter, to reflect on our week, to pray, and to organize the details. Only one girl had been to Kingston before, and she offered all the advice she could give.
But nothing could really prepare us for what we'd see. Jamaica is a third world country and was, at that time, engulfed in civil unrest. ( In fact, ours was the last trip to Kingston, as the city is too dangerous).
But amidst the crime, the poverty, images of starving children in the streets, and the sweltering heat, was one of the most touching moments of peace and beauty in my life.
We were blessed to work with the Missionaries of Charity in Kingston, and just seeing how these sisters devoted their lives helping the poor was overwhelmingly beautiful.
The residents in the Home for the Dying and Destitute were mostly older people, picked up off the streets and brought in the shelter for their dying days. But instead of fear and dismay, the walls were filled with love, laughter, and songs.
In addition to the Missionaries of Charity, we volunteered at a grade school, helping the teachers and principal with the lessons.
To thank us, the teachers threw us a dinner party, full of Jamaican favorites, including Akee and Saltfish, the dish they were raving about for days before the dinner.
As we were getting ready for the dinner, I remember feeling guilty for even having a party. It seemed odd to me to want to party after all we had seen there. When I told this to our group leader she replied, " you need to accept the gifts you're given."
So I did.
ACKEE AND SALTFISH (COD) RECIPE- Photo and recipe taken from here
Ackee and saltfish is Jamaica's national dish. This recipe is Americanized but still delivers great taste.
INGREDIENTS:
Serves: 4
1 Can of ackee, drained
1/2 lb boneless salt cod
3 tablespoons oil
2 onions, sliced
1/4 teaspoon dried thyme
1/4 scotch bonnet pepper skin finely chopped up
1 small tomato, chopped
3/4 teaspoon tomato paste
1/2 sweet pepper chopped
1/8 teaspoon black pepper
Recipe by ©eatjamaican.com
Soak the salt cod in a pot of water overnight to remove most of the salt. If the cod is still very salty, boil in water for 20 minutes. Drain cod and cut or break into small pieces.
Heat oil in a frying pan. Add the onions, thyme and scotch bonnet pepper, tomato, tomato paste and green peppers. Stir for a few minutes. Add the cod. Stir. Simmer for 5 minutes, then add the can of drained ackee. Do not stir because this will cause the ackees to break up. Cook for a few more minutes then sprinkle with black pepper.
Best served with bammy, roast breadfruit, fried or cooked dumplings, or fried or cooked plantains, cooked yams and Jamaican sweet potatoes.
Thursday, March 24, 2011
7 days to the big 3-0
I turn 30 on April 1st- but it's no laughing matter. Even though I've started an official countdown with this post and part of me is looking forward to my thirties, another slightly larger part of me is dreading it.
After giving it much thought, I realized why.
I loved my twenties.
I mean really really loved them.
Obviously there were the big things: graduations, career accomplishments, marriage. And these milestones really made my twenties shine.
But I can sum up the essence of my twenties in one word: travel.
My twenties took me to places I dreamed about ( ahem, Roma) and other places I'd never thought I'd go (Hello Minneapolis) so I've decided to dedicate this countdown to some of the places near and dear to my heart.
Of course, I'll include the food that will always always always take me back to that place:
So we'll start in a place where probably none of you want to go- but that I dreamed of as a teenager: The Bronx
I moved to the Bronx when I was 18 to attend Fordham University, and though I wasn't yet in my twenties, I did start the decade there, so it's only fair to dedicate at least one post to the "Boogie Down".
Unlike other freshman, I was armed with knowledge- my brother Joe went to Fordham four years earlier, and gave me the best brotherly advice possible- "Go to Pizza Mike's".
So while other freshmen sat in the cafeteria on our first night, I led a small group of new friends down Webster Avenue to get what would be the first of many Sicilian slices.
But any Fordham Alum will tell you that most late night- vodka infused debates stemmed from one topic-- who has the best pizza?
While Mike's is a strong contender, Pugsley's usually wins in the end.
A quick Google search confirmed that both are still in business and, as this is a Thursday night, I'm sure some undergrads are frequenting one of the local bars and trying to decide which pizza to consume at 3,4,or 5 am.
Even though I always preferred Mike's thick pizza- which was the main culprit of the notorious freshman fifteen that I packed on ( and didn't lose until my mid twenties)-- Pugsley's stole my heart for an entirely different reason: their chicken rolls.
Picture this folks: a chicken parm wrapped in pizza dough and baked in the oven. Enough said.
And while I don't have a recipe, or a photo, you can use your imagination on this one. If by chance you ever find yourself in the Bronx, you might just want to make your way to Pugsley's for one. Just take the D train to Fordham Road and follow the hoards of students, they'll steer you in the right direction.
After giving it much thought, I realized why.
I loved my twenties.
I mean really really loved them.
Obviously there were the big things: graduations, career accomplishments, marriage. And these milestones really made my twenties shine.
But I can sum up the essence of my twenties in one word: travel.
My twenties took me to places I dreamed about ( ahem, Roma) and other places I'd never thought I'd go (Hello Minneapolis) so I've decided to dedicate this countdown to some of the places near and dear to my heart.
Of course, I'll include the food that will always always always take me back to that place:
So we'll start in a place where probably none of you want to go- but that I dreamed of as a teenager: The Bronx
I moved to the Bronx when I was 18 to attend Fordham University, and though I wasn't yet in my twenties, I did start the decade there, so it's only fair to dedicate at least one post to the "Boogie Down".
Unlike other freshman, I was armed with knowledge- my brother Joe went to Fordham four years earlier, and gave me the best brotherly advice possible- "Go to Pizza Mike's".
So while other freshmen sat in the cafeteria on our first night, I led a small group of new friends down Webster Avenue to get what would be the first of many Sicilian slices.
But any Fordham Alum will tell you that most late night- vodka infused debates stemmed from one topic-- who has the best pizza?
While Mike's is a strong contender, Pugsley's usually wins in the end.
A quick Google search confirmed that both are still in business and, as this is a Thursday night, I'm sure some undergrads are frequenting one of the local bars and trying to decide which pizza to consume at 3,4,or 5 am.
Even though I always preferred Mike's thick pizza- which was the main culprit of the notorious freshman fifteen that I packed on ( and didn't lose until my mid twenties)-- Pugsley's stole my heart for an entirely different reason: their chicken rolls.
Picture this folks: a chicken parm wrapped in pizza dough and baked in the oven. Enough said.
And while I don't have a recipe, or a photo, you can use your imagination on this one. If by chance you ever find yourself in the Bronx, you might just want to make your way to Pugsley's for one. Just take the D train to Fordham Road and follow the hoards of students, they'll steer you in the right direction.
Monday, March 7, 2011
March is Madness
Hello lovelies!
I signed on this morning and felt the need to apologize for my month long unintentional hiatus. I meant to post more in February- it was actually written in on my planner each week, but like many things that month, I put blogging on the back burner.
So what have I been doing?
Mostly I've been grading and lesson planning- I actually forgot how time consuming teaching can be. Really, hats off to all you veteran teachers out there. I don't know how you do it year after year. It's only been half a semester and I'm ready to throw out my red pen and call it a day.
I've also been obsessively checking email lately ( which also takes time away from grading and, therefor blogging; its a vicious cycle of procrastination). The reason for my new behavior is that I have currently have five agents reading my book, and I'm waiting to hear what they all think. I'm an emotional eater, so, needless to say, I've been doing a lot of mindless snacking. Right now there's a jar of almonds sitting next to me which I keep reaching into.
It's sort of a good thing that I've been snacking lately because I actually haven't been cooking all that much. That's what working 4 nights a week will do to you. But don't worry, next week is spring break and I plan to spend most of it in the kitchen and at this computer.
Until then...
I signed on this morning and felt the need to apologize for my month long unintentional hiatus. I meant to post more in February- it was actually written in on my planner each week, but like many things that month, I put blogging on the back burner.
So what have I been doing?
Mostly I've been grading and lesson planning- I actually forgot how time consuming teaching can be. Really, hats off to all you veteran teachers out there. I don't know how you do it year after year. It's only been half a semester and I'm ready to throw out my red pen and call it a day.
I've also been obsessively checking email lately ( which also takes time away from grading and, therefor blogging; its a vicious cycle of procrastination). The reason for my new behavior is that I have currently have five agents reading my book, and I'm waiting to hear what they all think. I'm an emotional eater, so, needless to say, I've been doing a lot of mindless snacking. Right now there's a jar of almonds sitting next to me which I keep reaching into.
It's sort of a good thing that I've been snacking lately because I actually haven't been cooking all that much. That's what working 4 nights a week will do to you. But don't worry, next week is spring break and I plan to spend most of it in the kitchen and at this computer.
Until then...
Monday, February 7, 2011
pastaaaaaaa!

I have a confession- I'm not the biggest pasta fan.
Ok, that's sort of a lie.
I actually love pasta in any way, shape or form. I just don't eat it all that much. Not that I'm low carb or anything- if you've read this blog at all you'd know that.
It's just that I try not to eat too much white flour ( and when I do, I like it in cookie form).
But my husband, who was born and raised in Italy, loves his pasta. He'd eat it every day if I made it. I'm almost positive that before we got married he did eat pasta everyday. What can I say? He's a man who knows what he loves.
So to keep him happy, I make pasta every now and again, but usually I make a whole wheat version for myself (Gian Luca doesn't eat whole wheat pasta- that would be like giving up his Italian passport).

This particular pasta dish makes an appearance in my new book ( a novel with recipes).
I don't know the origin of pasta alla Norma, but I do know that it is a delicious mix of eggplant, onions and tomatoes. If you like eggplant parmigiana, you'll love this one.
Pasta alla Norma
serves two
1/2 pound rigatoni
1/4 cup extra virgin olive oil
1 medium onion, finely chopped
7 Roma tomatoes, diced.
2 cups eggplant, diced
salt and pepper to taste
1/4 cup grated parmigiano reggiano cheese
1/4 cup grated ricotta salata ( or feta)
1) Bring ten cups of water to boil. Add salt to flavor the pasta.
2) Heat olive oil in a medium saucepan. Add the onions, salt and pepper and cook until translucent.
3) Add the tomatoes and eggplant. Reduce the heat to low and allow the sauce to simmer for 15-20 minutes, adding a few spoonfuls of the pasta water if necessary. (While the sauce is simmering, you can cook the pasta).
4) Once the pasta is cooked, add it to the saucepan, and toss to coat it.
5) Top the pasta with grated parmigiano reggiano and ricotta salata ( or feta)
Friday, February 4, 2011
another snow day

It's 10:13am and I'm writing this post from my bed. Normally I'd be at the gym by now ( new years resolution!!) or at least, showered and out the door. But today, for the fourth day in a row, I'm home, savoring my snow day.
Today is especially nice because I woke up at about 6 am feeling like I got leveled by a bus. I'm a workaholic so I would have gone into work anyway, but the freshly fallen snow saved me.
It's lovely, really. I'd take a picture for you but you can probably look out your window and see the same exact scene ( unless you live some place tropical- in which case, I envy you)
I don't know about you, but snow days always make me lazy. I know I should be doing some work, getting ahead on my lesson plans, or creating cool assignments, but really, snow days are made for taking a break, fixing yourself a cup of tea and putting your feet up.
Think back to when you were a kid. You didn't do homework on a snow day. You went out and played!

Honestly, all I've really done is send a few emails and correct a few papers. I haven't even cooked much, hence the sandwich. Though, this afternoon I will be making a big pot of chicken soup.
And while that's cooking, I'll be doing what I love best. Reading.
I just finished Elizabeth Bard's Lunch in Paris, and Gretchen Rubin's The Happiness Project. After all that non-fiction, I'm craving some quality fiction, so I'm about to start Mary Anne Shaffer and Annie Barrows's The Guernsey Literary and Potato Peel Society.
I'm a fast reader and it looks like I'll be in bed most of the weekend, so throw your recommendations my way.
Ah, the luxury of snow days. When else can we devote and entire day to doing stuff we love?
What do you do on your snow days?
Friday, January 21, 2011
A determined woman
 Do you ever wake up in the morning and say "Today I'm going to..."
Because today, I woke up with determination, with gusto, and spirit. Today I'm going to finally master the art of making dough.
I'm not talking about pasta dough; that's easy. All that requires is a little flour, an egg and some water. I'm talking about any dough that requires my arch nemesis- yeast.
The only time I've ever tried to make bread with yeast I ended up with a brick that we had to saw through, dunk in coffee, and chew almost a thousand times before swallowing.
It was not pretty.
But last night it dawned on me. I'm almost thirty. And though I still get carded when buying alcohol, I can't fake it any longer. I'm almost thirty.

Before going to sleep, I though of what a great decade my twenties were. I graduated college and grad school, wrote a book, became a teacher, lived in Rome ( twice), met the love of my life, got married, moved around a lot, wrote another book--- whew.
All this and I'm scared of a little yeast.
Or at least I was until now.
To be completely honest, bread dough was a little too scary, so I thought of an easy alternative: pizza dough. Any good Italian girl approaching thirty should have a nice pizza dough recipe in her back pocket. That's not being stereotypical, it's just how it is. So this morning, in my determined state, I called my mother, a woman with more than one recipe under her belt.
My mother is perhaps the most determined woman I know; I can't even list all the she's accomplished in her life- it'd make my little list seem unimpressive. Really, she can do whatever she puts her mind to-- including figuring out mystery recipes from favorite restaurants.

My family hardly ever went out to eat- when you own a restaurant, you don't go out to restaurants for fun because you almost always leave disappointed. There are a few key exceptions to this, and Fiorello's in NYC is one of them.
Fiorello's has been a staple in my family for years. It's located right on Broadway, across the street from the Metropolitan Opera House, and has been my dad's favorite place for years.
We've celebrated big milestones there ( my twentieth birthday being one) and it's even the site of one of the first dates Gian Luca and I went on ( I finagled that one myself).
Ok, so what does this restaurant have to do with yeast bread? Among the things we love about Fiorello's is the amazing flatbread which they put in baskets on every table. I love it so much that, more than once I've gone in just to buy some. They don't normally sell it for take-out, but a determined woman always gets her way.
One day, my brother Joey came home from New York with a bag of flatbread for my mom. "Can you figure out how to make this?" he asked, and the challenge was on. Like I said before, my mother will always figure out how to make something.
It didn't even take her long. And before we knew it, the flatbread was a staple in our holiday breadbaskets. This Christmas alone I must have eaten at least two trays. It's that good.

And now, after almost thirty years of life, I too have mastered the recipe for flatbread, yeast and all. This is probably a bad thing actually, since I've already eaten four pieces.
Yeast beware- I'm no longer afraid of you. Next time, I'll be baking bread.
Flatbread-
1 envelope dry active yeast ( 2 1/4 teaspoons)
1/4 cup warm water (100-110 degrees)
1 teaspoon sugar
3 cups flour
1 tablespoon extra virgin olive oil ( plus more for coating the pans)
1 cup water
mixed herbs ( I used parsley, oregano and rosemary)
salt and pepper
1- Preheat oven to 400 degrees
Stir 1 envelope yeast into 1/4 cup warm water. Stir in 1 teaspoon sugar and let rest for ten minutes. If the mixture doubles in volume, the yeast is active.
2- In a large bowl, combine the flour, water and olive oil. Stir in the yeast and knead until the dough forms a ball ( you can use a mixer with a dough hook if you want).
3- Cover tightly with plastic wrap and leave in a warm place for at least 30 mins.
4- once the dough rises to double its original size, punch it down. ( This will be enough for two medium sized pizzas if you want it for that).
5. Generously oil a baking sheet. Stretch 1/4 of the dough onto the sheet, making sure to pull it nice and thin ( don't worry if it tears a little).
6. Drizzle olive oil on top of the dough, and add your favorite herbs, salt and pepper.
7. Bake for 10 minutes, or until golden brown.
Tuesday, January 18, 2011
our new kitchen

Right now, our kitchen smells like the chicken soup bubbling on the stove and the table is covered with papers and books. My husband's sweatshirt is strewn over a chair and mail is piling up on the counter-tops. It might sound like a disaster, but it feels so right.
 To be honest, when we looked at this house for the first time, I wasn't really attracted to the kitchen. It wasn't ugly ( except for the purple walls) and it didn't really need any work, but for some reason, I didn't like it.
The staging felt cold, abandoned.

We moved right after Thanksgiving and the first boxes I unpacked were for the kitchen. It seemed like the logical place to start. And little by little, the place started to feel like home (the new spiffy yellow walls helped a little too). Soon enough, I fell in love.
So even though most of the house is empty, our kitchen is warm and lived in.
Thursday, January 13, 2011
a procrastinator at heart
On December 31st I made a bunch of resolutions.
In 2011 I would:
1- Go on a diet
2- Join the gym
3- Blog regularly ( about what, I don't know, since I'd be dieting)
You get the point.
And here it is, January 13th and I've done none of these. Should I blame the cold weather? The fact that we were traveling for the Holidays? Or should I just chalk it up to the fact that some habits can't be broken.
Like procrastination, for instance.
I'm the number one culprit. In college and grad school a paper couldn't be written unless it was due the next day ( thank God for coffee). And even as a teacher, I would put off grading until the students started nagging me about their tests.
Then there's the house work, which I always promise to start right after this show...
And of course I'll finish this book, right after I clean the house.
You know the drill.
Yep, I'm the queen of procrastination.
I guess I should do something about that.
But first let me finish this blog post.....
In 2011 I would:
1- Go on a diet
2- Join the gym
3- Blog regularly ( about what, I don't know, since I'd be dieting)
You get the point.
And here it is, January 13th and I've done none of these. Should I blame the cold weather? The fact that we were traveling for the Holidays? Or should I just chalk it up to the fact that some habits can't be broken.
Like procrastination, for instance.
I'm the number one culprit. In college and grad school a paper couldn't be written unless it was due the next day ( thank God for coffee). And even as a teacher, I would put off grading until the students started nagging me about their tests.
Then there's the house work, which I always promise to start right after this show...
And of course I'll finish this book, right after I clean the house.
You know the drill.
Yep, I'm the queen of procrastination.
I guess I should do something about that.
But first let me finish this blog post.....
Thursday, December 9, 2010
A Lot of Catching Up to Do

Hello blog friends! I logged on this morning and saw that the last time I wrote was in October. October!
Honestly, I am not sure where time goes, especially around the Holidays.
I know I have a lot of catching up to do, but don't worry, I'll make it brief.
First things first- the big news- Gian Luca and I bought a house!
We closed the deal in October but just moved in a week ago, so you can imagine how busy we've been. And living out of a suitcase isn't really conducive to cooking. But thankfully, my mom came here to help us so we're mostly unpacked and settled in. I'm actually sitting in my new kitchen right now!
Next- Since I haven't been working in Texas I've had lots of time to write, and I wrote a new book. It's fiction but with lots of recipes. I don't want to give too many details now, but I think you'll like it.
Oh yeah, and I got a job. And I cooked my very first turkey this Thanksgiving. And ate my first quince.
Whew!
So now that you're all caught up, it's time for a recipe, and this Shrimp Risotto is straight from my mom. She made this here the other night, and taught me that risotto is nothing to be afraid of. It's quite simple and fast actually, so don't believe all the hype about stirring and stirring and stirring- it's just not true.
So here goes- Simple Shrimp Risotto- Enjoy!
Shrimp Risotto
Serves 4
For the risotto
1 small onion, diced
2 tablespoons olive oil
1 tablespoon butter
1 pound of small shrimp
2 cups Arborio rice
1 cup white wine
3-6 cups water boiling water
salt to taste
1/2 cup of fresh Italian parsley, chopped.
1) Heat olive oil and butter in a large, deep saute pan. Add the onions and cook until translucent.
2) Add the shrimp and cook until just pink.
3) Add the Arborio rice and stir until all the rice is coated with oil and butter. Continue cooking for one minute.
4) Add the white wine and stir until it is all absorbed.
5) Add one cup of water. Allow the rice to absorb all the water before adding more.
6) Repeat until all the water is used. Add salt to taste.
7) Cook until the rice is soft, with a slight bite to it.
8) add chopped parsley and stir to incorporate.
* the risotto can be eaten like this, or with the addition of extra shrimp( see below)
For the shrimp on top
2 tablespoons extra virgin olive oil
1 garlic clove, chopped
1 cup white wine
1/2 pound medium or large shrimp
1) In a medium saucepan, heat the olive oil.
2) add the garlic and sautee until golden.
3) add the shrimp and cook until pink.
4) add the white wine and salt to taste.
5) spoon over risotto and top with fresh parsley.
Enjoy!
Thursday, October 14, 2010
Imagination in the Kitchen

As most of you already know, when I was seven, my parents made a move that would change my life; they opened a restaurant. They were hands-on restaurateurs, running on a tight budget, so my mother cooked while my father worked his day job and managed the restaurant at night. Being the youngest of five children, I was always attached to my parents, and while my brothers were perfectly content to stay home alone or with a babysitter, I refused to do so. The only option was to keep me in the kitchen, close to my mother while she worked.
At first, I was excited to be there and see the bustle of the kitchen. But after about one day, I was bored. I grew anxious and, like a typical seven-year old, began whining. Not knowing what else to do, my mother handed me a large stainless steel mixing bowl, positioned a large crate of sting beans at my feet and gave me a task that would keep me busy for hours.
“Snap these” she said, demonstrating how to removed the unwanted ends of the beans. “When they're clean, put them in this bowl.”
"How many should I do?” I asked, thinking that I would have to snap fifty or at most, one hundred.
“The entire case” my mom replied, returning to work behind the stove.
I looked at the box at my feet. There were at least a thousand beans in there. My eyes grew wide and I sighed heavily. The restaurant was ruining my life, but I knew if I kept complaining I’d be homebound with a babysitter, so I reached in the case and grabbed a handful of beans.
Though the work seemed daunting, I tackled it with finesse. As my tiny fingers worked rapidly, my mind reeled. I made up stories, pretended to be different characters; a lost princess held captive and forced to work kitchen duties; a farm girl responsible for the family dinner. Lost in thought, I didn’t realize that time had passed. Before long a huge pile of beans filled my bowl; I had finished the entire case and had had fun doing so.

Looking back, it's clear that my early time as an impromptu sous chef taught me an invaluable lesson; it taught me to use my imagination in the kitchen. Often I would see my mother experimenting, adding ingredients, tasting, stirring, and, sitting next to her with my pile of beans I’d pretend to be a chef doing the same.
Nowadays, I do not pretend to be someone I’m not, however, I still allow my mind to wander when faced with tasks that are so banal, like snapping string beans, that they require little attention or thought. During these moments, I’ll get inspired to throw a little extra spice into a dish, or mix ingredients that generally do not work well together. I’m no chef, just a home cook who allows her imagination to run wild. Sometimes I come out on top, and other times the food ends up half eaten or scraped into the garbage. But either way, I am successful, if I am able to relax, to experiment, and have fun. Which is really what cooking is all about anyway.
String Beans with Garlic and Mint
1 pound string beans
1 small clove of garlic (chopped)
3 tablespoons extra virgin olive oil
2 tablespoons fresh mint (chopped)
salt and pepper to taste
Blanche sting beans in salted boiling water for 3 minutes. Drain and transfer into a salad bowl.
While beans are still warm, top with garlic, mint, olive oil and salt and pepper. Toss together and serve.
Thursday, October 7, 2010
Lovely Split Pea Soup

We've been in Texas for a good four months now, and although I'm loving my new state ( and this absolutely gorgeous October weather) I do have one minor issue...
They say everything is bigger in Texas and they're not joking. It's almost impossible to go to a restaurant and not get a Texas sized portion put on the plate in front of you. And meat dominates most of that plate. Now, its not that I've gone vegetarian or anything, but frankly, I'm tired of meat!
The other day, in a near frenzy, I decided to take matters into my own hands. I ran out to Whole Foods and bought fish- wonderful calamari- which I thought I'd score and grill in a hot pan.
Earlier in the day, I'd been flipping through Jamie Oliver's Jaime at Home and saw an amazing recipe for grilled calamari with leeks. The picture made me salivate; I wanted that dish right now. Within half hour, I was picking up the goods and dreaming of the clever post I'd share with you all.
The calamari smelled funny right from the start, but to be honest, I wasn't quite sure what calamari was supposed to smell like, so I proceeded as I normally would, prepping the fish with salt and pepper, getting the grill hot enough.
But somewhere along the line, our kitchen ( or, more accurately, our entire apartment) filled with fishy smoke. I opened all the windows and had all the fans going, but the smell lingered, and despite the fact that the leeks looks beautiful, I didn't even want to try the calamari. So I threw them in the oven to get them out of my sight.
To escape the smell, I went to pick up Gian Luca at his office. I drove with the windows down, but the minute he got into the car, his face wrinkled into a scowl.
"What's for dinner?" he asked.
"Grilled Calamari," I said with a smile, hoping that if I made it sound good, it would taste OK.
But when we entered the apartment the smell slapped us in the face. "Oh my God," Gian Luca exclaimed. "It smells like a dead whale in here."
Only he didn't say it in English. He said it in Italian. And though balena morta, sounds lovely, it's not exactly what you want to eat for dinner.
Still hoping for a miracle, I pulled the calamari out of the oven. In horror, I looked at the shriveled, dried out fish. 'We're not eating this," I sighed, and Gian Luca whole heartily agreed.
We ate fried eggs and toast for dinner that night.
Ok, so maybe the calamari thing didn't turn out exactly as planned. Still, the thought of eating another steak, or even piece of chicken was making me sick, so I tried a completely vegetarian option this time. Split Pea Soup.
And after simmering on the stove for an hour, it flavored the house with that wonderful soup smell.
And it tasted even better.
Split Pea Soup
1 bag dried split peas
1 small onion
4 celery stalks
3 carrots
2 tablespoons extra virgin olive oil
6 cups of water
1 1/2 teaspoons salt
1 teaspoon black pepper
1) Finely chop the onion, celery, and carrots in a food processor. Heat the olive oil in a large soup pot, over a medium flame.
2) Add the chopped onions, celery and carrots and cook for a few minutes, until slightly golden.
3) Add the split peas, water, salt and pepper. Bring to a boil.
4) Lower heat and simmer the soup until peas are tender. ( About 1 hour)
5) If you like a creamier soup, let the soup cool slightly and spoon into a blender. Blend until smooth.
6) Serve with grated cheese and a dash of cayenne pepper, for an added kick.
Thursday, September 23, 2010
The Classics

Just as soon as the September wind starts rustling the leaves, I start thinking about school.
It's been more years than I want to admit since I've been enrolled in school, and even a few years since I've been teaching, but inevitably, in the beginning of September each year, I stock up on school supplies ( you always need pens and notebooks around the house, especially when they are 25 cents each!), and start reminiscing about packing up my school bag, grabbing my bagged lunch, and heading off to school.
I also start thinking about the classics. I've always been keen on the classics.
Instead of taking Spanish or French in high school, I opted for Latin because it doesn't get more classic than that. In college, I learned to enjoy some classics ( like Plato and Aristotle) and loathe others ( Beowulf- ugh!), but still my appreciation for things untouched by time grew.
And you have to admit, sometimes the classics are just better. For example, everyone has a piece in her wardrobe that's timeless- a piece that was purchased years ago, that has withstood its trendier counterparts, and still hangs proudly in the closet. For me, its a vintage blue Fontana dress that I found in a thrift shop in Rome. Even though the dress is from the 50's it still looks amazing and is guaranteed to reap at least one compliment each time I wear it. It is by all means, a classic.
Then of course, there are recipes which we cook without effort, ones which we keep in our back pockets for dinner parties ( mine is lasagna) and others which we can whip up on a moments notice with ingredients we already have in the house ( like the pasta with zucchini and lemon that I'm going to make as soon as I finish this post).
Still, there are tried and true classics which everyone should learn. And in terms of cookies, I can think of two biggies- chocolate chip ( obviously), and shortbread.
Since I'm always trying to expand my baking repertoire, and I already know how to make a decent chocolate-chip cookie, I figured it was high time I learned how to make a proper short bread cookie.
And now that I've got them under by belt, it seems like there's no better use for flour, butter and sugar.
Give them a try, and then snuggle up with a classic novel( just not Beowulf!) and a cup of tea. Enjoy!
Classic Shortbread
( adapted from Martha Stewart)
makes 8 extra large cookies
2 cups all-purpose flour
1 1/4 teaspoons course salt
1 cup ( 2 sticks) unsalted butter, at room temp, plus more for the pan.
3/4 cup confectioners' sugar.
1) Sift together flour and salt into a bowl. Put butter into the bowl of an electric mixer fitted with the paddle attachment. Mix on medium-high speed until fluffy, 3-5 minutes, scraping down the sides of the bowl. Gradually add confectioners' sugar; beat until pale and fluffy, about 2 minutes. Reduce speed to low. Add flour mixture all at once; mix until just combined.
2) Preheat oven to 300 degrees F. with rack in upper third.
3) Using plastic wrap, press dough into a buttered 10-inch fluted tart pan with a removable bottom. With plastic on dough, refrigerate for 20 minutes. Remove plastic wrap. Cut out a round from the center using a 2 1/4 inch cookie cutter; discard. Put cutter back in center. Cut dough into eight wedges with a paring knife. Using a wooden skewer, prick all over at 1/4 inch intervals.
4) Bake until golden brown and firm in the center, about 1 hour. Transfer pan to wire wrack. Recut shortbread into wedges; let cool completely in pan. Cookies can be stored in a airtight container at room temp for up to 2 weeks.
Tuesday, September 14, 2010
Sunshine on a Plate

Can you believe it's already September 14th? Honestly, where does the time go?
September is actually my favorite month of the year because it seems like no matter where I live, I get to savor the long Indian Summer days.
In New Jersey, September is my favorite time at the shore because the beaches are no longer crowded and the water is actually warm ( if you've ever been to the Jersey shore, you'll know that the water is usually ice cold).

And of course, here in my new state, September is just an extension of the summer. We've had multiple days over 100 degrees and I've soaked up each one. It seems like it's always sunny in Texas.
So, logically, I wanted to capture the same sunshine on my dinner plates and this lemony Tilapia dish does just that. With a side of spinach and seasonal spaghetti squash, dinner can be served in less than 30 minutes, leaving you with plenty of time to grab an Iced Tea and head outside to catch the breathtaking September sunset.

Broiled Tilapia
Serves 2
2 Tilapia filets
1 lemon
2 tablespoons chopped Italian parsley
1 clove of garlic, finely chopped
1 tablespoon extra virgin olive oil
salt and pepper to taste
1) Lay Tilapia on a non-stick baking sheet. Grate the zest of one lemon over the Tilapia.
2) Top with parsley, garlic, olive oil, and the juice of one lemon. Add salt and pepper to taste.
3) Place under broiler for 7 minutes ( or until cooked through)
Sauteed Spinach
2 cups Spinach
1 clove of garlic ( whole or chopped depending on your taste)
1 tablespoon extra virgin olive oil
salt and pepper to taste
1) Heat olive oil in a medium saucepan. Add the garlic and sautee until lightly golden.
2) Add the spinach and toss until wilted ( about 1 minute)
For spaghetti squash click here
Enjoy!
Tuesday, August 24, 2010
A truce, a birthday and english soup
 Okay Texas- I'm calling a truce. Since we'll be living in Texas for God know how long, I need to make peace with the state. I guess it's not that bad- out of the month and a half we've been here we've had sunshine every day. And yes, its hot, but its not too humid, so it feels good.
Besides the weather, Texas has a lot to offer. It is the biggest state in the union, so there's so much to do and see. We've been to Dallas a few times, and are looking forward to trips all around the state. So I guess Texas and I can be friends. Whew- our little feud was getting tiring.
Now that that's out of the way- I had a recipe for you ( or y'all as the Texans would say).
Yesterday was Gian Luca's birthday and to celebrate, I made his favorite dessert Zuppa Inglese.
Zuppa Inglese translates to "English Soup" and the only reason I can think of for the name is that this dessert is like an English Triffle and is sometimes served in a bowl.
Originally created to use the scraps from a cake, Zuppa Inglese is layers of cake, cream, chocolate, coffee and Alchermes, a spicy, sweet liquor from Italy.
 It's almost impossible to find Alchermes here in America. I actually just googled it and no one sells it. It's not even imported and there are no recipes to make a bath-tub version either.
Last year, for Gian Luca's birthday I drove to all the best wine shops in Minneapolis and Saint Paul, asking everyone who I talked to about it. No one had ever heard of it, and back then, I didn't know what it tasted like, so my only description of the liquor was that it was bright red. Upon hearing this, people in the first two stores led me to the Campari, which is bitter and wonderful but nothing at all like Alchermes. I gave up in frustration and made Tiramisu instead.
This June, when we went to Italy, Gian Luca's mom bought us a bottle to take home. If you're interested in getting a bottle you apparently have to do the same. Or ask a friend who's going to Italy.
If no one you know is going to Italy any time soon, you can still make the Zuppa Inglese because the rest of the ingredients are delicious, even without the Alchermes. And if you want the beautiful splash of red color- just fake it and use grenadine.
 Zuppa Inglese can be made with either Savoiardi ( Dried Lady Fingers) or Pan di Spagnia ( yes, translated that means "bread from Spain"- what an international dessert!). It was impossible for me to find the Savoiardi here in Texas, so I opted for the Pan di Spagnia, which I can easily make at home.
Basically Pan di Spagnia is Italy's version of Angel Food Cake, though you don't have to bake it in a tube pan or hang it upside down on a bottle ( I never understood the need for that!). My mom's version of Pan di Spagnia ( see recipe below) is make in a 9 inch spring form pan, which makes it easy to remove.
But even if you break the cake, or, if like me, you don't cook it long enough and the center turns out a bit raw, it's not big deal. Zuppa Inglese is made by layering pieces of cake with cream, so feel free to cut, tear, or rip off big hunks of your freshly baked Pan di Spagnia.
The cream in Zuppa Inglese is Crema Pasticchiera- Italian Pastry cream, which can also be used in a variety of desserts like Italian Rum Cake, or cream puffs. Its lemony and not too sweet, perfect for a Zuppa Inglese.
Besides the cake and the cream, all you need is a little chocolate powder or chocolate chips and a nice strong double shot of espresso.
My husband was on to something with this one. Who wouldn't love a dessert that combines Liquor, Cream, Chocolate and Espresso?
Happy Birthday Gian Luca!
Zuppa Inglese:
Zuppa Inglese can be made as one large Trifle, or in individual glasses, as I did. This recipe makes enough for six people and can be kept in the fridge for one day.
Pan di Spagnia
5 eggs, separated
1 cup sugar
3/4 cup all purpose flour
1 teaspoon Baking powder
1) Preheat oven to 400 degrees. Line the bottom of a 9 inch spring form pan with wax paper. Set aside
2) In a large bowl, beat egg yolks with sugar until soft yellow ( about two minutes)
3) In a different bowl, beat egg whites until they form stiff peaks.
4) Sift together flour and baking soda.
5) Alternate folding the egg whites into the yolks, adding a small bit of flour after each incorporation. Repeat until all the egg whites and flour have been added.
6) pour into prepared pan and tap the pan against the counter a few times to settle any air bubbles.
7) bake for 25-30 minutes or until a toothpick inserted in the center comes out clean.
8) For the Crema Pasticchiera recipe click here
9) Once you've made your cake and cream, and the cream has chilled for at least an hour, take half of the cream and place it in a separate bowl. Set the rest aside.
10) depending on whether you like dark or semi-sweet chocolate, you can either add coco-powder to the cream, stirring until incorporated, or you can melt 1/4 cup of chocolate chips and stir that into the cream. I actually did a mixture of both.
11) Brew a double shot of espresso and add a shot of hot water to weaken it a bit.
12) Cut the cake into cubes and begin layering you Zuppa Inglese like so: Cake, coffee poured directly on top, a drop of Alchermes ( or grendine), plain crema, and chocolate crema. Repeat as necessary.
Saturday, August 14, 2010
When it rains...

Whoever invented the saying, " when it rains, it pours," must have lived in our apartment in Texas. If you've been reading this blog, you know that the Lone Star state and I don't really get along too well, and my last week proved that things were not getting any better.
It all started last Thursday when I left the apartment for a mere 10 minutes to go the laundry room and throw a load of wash in the machine. I returned to find a small lake in the middle of my apartment floor. I thought we had just left the state of 10,000 lakes, but apparently, I was wrong. Though I couldn't locate the source of the leak, I cleaned up the mess and called maintenance. Little did I know this would be one of the 17 phone calls I'd make over the next six days, or that the bucket full of water that I wrung out of rags would be the first of many that we'd have to deal with.
Yes, that's right, our apartment flooded for six days before management finally called a plumber.
At a certain point during day two of the floods, I needed to bake a cake to bring to a friend's house for dinner. Since I couldn't exactly leave the apartment, lest a plumber finally show up only to be locked out of the place, I had to make do with what I had in the kitchen. I found some flour, sugar, butter and nectarines. Since we still don't have internet in our place (don't even ask) searching for a recipe on google was out.
Naturally I turned to Martha, and found a delicious looking recipe for a skillet cake in the August issue of Martha Stewart Living. I don't have a skillet but the recipe said I could use an 8-inch cake pan instead.
Since I was using a cake pan, I forgot that this cake is called a Skillet Cake for a reason, and as I prepped the ingredients, whipped the butter and sugar, and sliced super thin slices of nectarines, I never once pondered the name. I had never made or eaten a skillet cake, so I was blindly unaware that it is to be served in the skillet. It makes sense, I know, but Martha also forgot to mention it in her recipe ( tisk tisk). So when the beautiful plump cake had completely cooled I thought it appropriate to try to flip it out of its pan. After all, I certainly didn't want to bring a luscious cake to someone's house in a cake pan. That would be like dressing a Van Gough painting in an Ikea frame.
I slipped a plate over the cake and inverted it. Nothing happened. I tapped the bottom of the pan one, twice, three times. No luck. The cake wasn't budging. I should have stopped there. But no, I was determined, full of frustration from my floor and the phone calls which had been ignored, and the way that management was treating us. So I flipped the cake upside down on a plate and whacked it, causing the center to fall out in big crumbs.
Then I understood why it is called a Skillet Cake. You're not supposed to take it out, instead, you're supposed to serve it right in there. I was so mad at myself that I wanted to scream or cry or at least, call Gian Luca and have him tell me it was no big deal.
Then the floor started flooding again. And as tears rolled down my face, I realized there was nothing I could do so I took a piece of the cake in my hands and ate it. At least it tasted good.
Plum Skillet Cake
Photo and Recipe Adapted from Martha Stewart Living
Serves 4
- 4 tablespoons unsalted butter, room temperature, plus more for skillet
- 1 cup all-purpose flour, plus more for skillet
- 1/2 teaspoon baking powder
- 1/4 teaspoon baking soda
- Coarse salt
- 3/4 cup plus 2 tablespoons sugar
- 1 large egg
- 1/2 cup low-fat buttermilk
- 2 ripe medium plums, thinly sliced
Directions
- Preheat oven to 375 degrees. Butter an 8-inch ovenproof skillet (preferably cast-iron); dust with flour, tapping out excess. Whisk together flour, baking powder, baking soda, and 1/2 teaspoon salt. Beat butter and 3/4 cup sugar with a mixer on medium speed until pale and fluffy. Beat in egg. Add flour mixture in 3 additions, alternating with buttermilk.
- Pour batter into prepared skillet, and smooth top with an offset spatula. Fan plums on top, and sprinkle with remaining 2 tablespoons sugar. Bake until golden brown and a toothpick inserted into the center comes out clean, 35 to 40 minutes. Let cool slightly.
Subscribe to:
Posts (Atom)